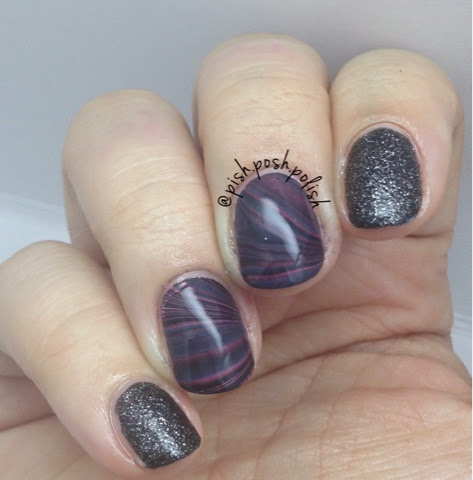
Showing posts with label Watermarble. Show all posts

Friday, July 24, 2015

Random Nail Art Roundup!


Hey y'all! Today on the blog I have a few manis to share with you just for shiggles (thank you Tamara at Dancerspolishedlife for that fun word). These are just some manis I've done recently that don't have much purpose in a post of their own so I thought I'd pile them all together. Quick and easy and fun for y'all to look at! Let's take a peek, shall we? 


Here's a watermarble using Shinespark Polish's 80's neon cremes with white stamping using UberChic Beauty stamping plates - these were so fun and summery. I love how easily the Shinespark neons watermarble! 


And one of my most favorite manis ever using China Glaze Inner Beauty and Lorelei Lacquer Faithless Lover in a jelly sandwich and stamping over it with M Polish Guilded and Dancing in the Streets. I loved how they looked matted but I also have the glossy macro to show you! 


Lastly is a clean and simple dotticure using Orly White Tips and Shinespark Polish Totally Teal. Dotticures are one of my favorite quick and easy nail art designs. I love teal and white together! 

And that's it! See, I told you it was a quick and easy post! I loved these manis but I am sort of backlogged at the moment on posts so while I wanted to write about each of them, I didn't have the time. I still didn't want them to fall through the cracks! 

Which was your favorite? 

Thanks for reading!

**Want to see more? Follow me on Instagram, Facebook, and Twitter to see more nail art and swatches!**

Saturday, June 6, 2015

FormulaX Infinite Ombré looks and review!

Hey y'all!

Let's just start off by saying, yes. It's been a bit since I have written. Life got all hectic and crazy so blogging took a backseat to everything else. I'm going to recommit myself to at least 1, hopefully 2 posts a week again so stay tuned! 

Today on the blog I have a review of the FormulaX Infinite Ombré kit. I was provided this kit by Preen.Me as a part of their Preen VIP program. The kit includes a base color called Platinum Prime and four colors that have a jelly-like finish: Boundless Berry, Timeless Teal, Infinite Indigo, and Limitless Lemon. 


Image credit: Google Images

These polishes are highly blend-able, making gradient and ombré looks easier. You can blend them with the brush out of the bottle, with a sponge, or with a nail art brush. I did 3 separate looks with these polishes to show how they work in different applications. Let me show you what I did. 


My first look is a sunset gradient with some handpainted palm trees. For this look I used the base Platinum Prime and two colors Boundless Berry and Limitless Lemon. Once the base was down and dry (one coat), I dabbed a little Boundless Berry towards my cuticle and a little Limitless Lemon towards the tip of my nail. While the polishes were still wet, I blended them messily with a fan brush. I made 3 passes to achieve this look. I gave it a few minutes to dry and then painted on the palm trees with acrylic paint. Once everything was dry, I topcoated with Seche Vite. 


The second look is a sort of stained glass , quatrefoil look using the base and all four colors. Once I had laid down the base - Platinum Prime, I used a latex free makeup sponge to dab all four colors onto my nail. I made 3 passes for complete opacity. I topcoated and allowed everything to dry. Then I went back in with my stamping plate (UberChic Beauty  3-02) and the silver base to stamp the quatrefoil design on all of my nails. I was pleased with how crisply the base stamped! I topcoated with Seche Vite.


The third look is a watermarble using all four colors in the kit over the silver base. This one was my favorite and the most surprising. Since the polishes are meant to easily blend, I expected them to get muddy when I was trying to draw the design. As you can see, they came out very neat and crisp. I started with a dry base of Platinum Prime and dropped the colors into room temp water until I had enough rings. I drew in the flower design with my watermarble tool, dipped my finger, removed the excess polish, and removed my finger. I topcoated with Seche Vite. 


Now for the review portion! I was pleasantly surprised with how these polishes performed. I have been doing gradients and ombres for over a year now, so when I saw this kit, I thought it was a tad gimmicky. Most polishes will blend just the same as these do, even if they're not part of an "ombré" kit. If you've got a silver polish and some colored jelly polishes, you basically already own this kit. Take that with a grain of salt though, as I own over 300 polishes. LOL 

That being said, these polishes all have a beautiful formula and are very vibrant when used over the silver base. They do blend very nicely on the nail and I like how versatile they are to use. If you were considering this set or a set like this, I say go for it, as I can see getting a lot of use out of it if you don't already own something similar. 

Thank you to Preen.me, FormulaX, and Sephora for teaming up and providing these polishes to bloggers and Instagrammers for looks and review. They were fun to play with! 

Want to see more? Follow me on Instagram for more nail art and swatches. 

Saturday, March 28, 2015

Watermarble and stamping!

***Nothing to disclose***


Hey y'all!

Today on the blog, I have some super fun watermarble nails to show you! I was positively thrilled with the outcome of this mani. I wore it for 3 full days because I loved it so much. 

Watermarble nails using Shinespark Polish's 80's Neon Collection


Here's what I used to create this look:


Back row, left to right: QTica nail growth stimulator, Orly White Tips, Funky Fingers Dark Knight, INM Northern Lights, KBShimmer Clearly On Top. Front row, left to right: Shinespark Polish Pumped Pink, Yuppie Yellow, Psych'd Purple, Bouncin' Blue, and Glam Green. Stamping Plate in the front is Cici&Sisi Plate 03.

Here's a closer look at the image I used to stamp:

Image from Cici&Sisi plate 03.
I started with a base of Orly White Tips after applying my base coat. I allowed it to mostly dry and applied a liquid latex barrier around my finger for the watermarble. I started dropping the polish into the water in the order that I showed them above, made a random design, and dipped my fingers one at a time. I actually wasn't planning on stamping these at first but this watermarble was NOT my best work and I didn't have time to redo an entire mani. I had seen my lovely friend Megatuce stamp over a neon watermarble so I just went with it. I used Funky Fingers Dark Knight to stamp my design and sealed it all in with KBShimmer Clearly On Top. I love it! 

Here's another shot of the finished product:

Neon watermarble with stamping

What do you think of this look? Have you ever stamped over a watermarble design?


Want to see more? Follow me on INSTAGRAM for more nail art and polish swatches!


Thursday, March 26, 2015

Watermarble using M Polish!

***Nothing to disclose***


Hey y'all!


Today on the blog, I have a simple post for you showing these pink and nude watermarble nails. 


Watermarble using KBShimmer In Bare Form as a base and M Polish Annette for the marble.

Here's a picture showing what I used for this look:

Left to right: QTica nail growth stimulator, KBShimmer In Bare Form, M Polish Annette, Sally Hansen Clear'd For Takeoff, KBShimmer Clearly On Top

I started with 3 coats of KBShimmer In Bare Form as a base color for my watermarble. Once it had a few minutes to mostly dry, I placed liquid latex around my nail to protect my skin from the polish. Using M Polish Annette and a clear polish from Sally Hansen called Clear'd For Takeoff, I created the watermarble that you see above. Once it had dried for a few minutes, I added my favorite new topcoat: KBShimmer Clearly On Top. 

I was really happy with how this turned out, although it was cloudy that day so I wasn't able to capture the sparkle of In Bare Form which is always a bummer. Why is it always cloudy when I want to wear a holo?! 

What do you think of this look? Have you ever used clear polish for a watermarble? Which clear is your favorite for that technique?


Want to see more? Find me on INSTAGRAM to see more nail art and swatches!

Sunday, March 1, 2015

Monthly Mani Favorites - February

Hey y'all! 

Today on the blog I have my favorite manis from the month of February. 


I love how differently each turned out. The top left was a stamped mani, the top right was a freehanded design, the bottom left was a watermarble, and the bottom left was a vinyl mani. I really spanned the spectrum of mani techniques this month! :D 

This month was also the month of epically dry hands, so I am not super happy with any of my photos this month. I feel like the dryness takes away from the finished product. Spring is right around the corner though! I've been slathering on cuticle oil and drinking water like its my job so here's hoping March has some better skin! 

Here's a single picture of each mani:


This one was for Valentine's Day of course. 


This little freehanded fox was inspired by OneNailToRuleThemAll. I was very pleased with my outcome on this one. 


This one was a watermarble using my new MPolish which is actually a stamping polish but it marbles well too! 


Probably my absolute favorite of the bunch, this mani was done with Glammymani nail vinyls. 

Which one is your favorite? Did you have a favorite of your manis this month? 


Saturday, February 21, 2015

MPolish watermarble

Hey y'all! 

Today on the blog, I have these glorious watermarble nails brought to you by MPolish. MPolish is an up and coming indie polish brand that specializes in FIVE free stamping polish. 


I purchased the full spring line on the date of launch, February 17th and she sold out minutes later! Keep reading and you'll see why! 

Colors (left to right): Apricot Delight, Starflower, Apple Blossom, Sweet Clover, Snowberry, and Bells Of Ireland. 


The spring line of MPolish includes 6 iridescent colors that work best when stamped (or watermarbled in this case)   over a darker color. They are beautiful over almost any color but when you put them over a darker base, they almost glow. 

(I am loving the idea of taking a macro this way, I totally borrowed the idea from my friend Manna over at Manna's Manis. Go check her out!)


Here's a picture of the polishes I used for this marble:

Shown here (left to right): Essie protein base, Zoya Sailor, MPolish Apple Blossom, Snowberry, and Starflower, Seche Vite 


Pictures do not do these polishes justice, you really must see them in person. I cannot stop staring at my nails! 

Even though they're stamping polishes, I had to try watermarbling with them. My thought process went something like: I watermarble with the same mainstream polishes that I use for stamping > MPolish is a stamping polish so it's highly pigmented > let's give this a whirl. 


Isn't it beautiful? 

Now, I won't say that I had an easy time getting them to spread at first but I was using cold tap water. It's typically easier to get polish to spread in room temperature water. I will be trying this with them again using room temp water so I can report on their true watermarbling abilities. 
*****UPDATE: I tried marbling with them again with room temperature water and they spread like a dream!*****


What I can say is that these polishes are unlike any others I have in my collection of over 300 polishes both in quality and distinctive finish on the nail. You will not be disappointed in MPolish and you definitely need the whole collection even if you're not an avid stamper as they can be used for other nail art techniques! 

As I stated before, MPolish sold out during her launch, but she is currently accepting pre-orders for a second release of the full spring line. You can place your order HERE.

What polishes are you most looking forward to for the spring? Did you manage to snatch up some MPolish?

**these polishes were purchased by me. The review aspect of this post express opinions that are solely my own.** 


Tuesday, February 3, 2015

Bestie twin nails - Valentine's watermarble edition!

Hey y'all!


Tonight on the blog, I have this super cute pink watermarble that is perfect for Valentine's Day! 

One of my best nail buds and I decided to team up for bestie twin nails. Say hello to Megatuce! 


If you haven't visited her blog or Instagram, you're definitely missing out. Not only is this woman an amazing nail artist (can you say stamper extraordinaire??) but she is also about to release her very own line of 5 free stamping polishes AND the best part is that she is an amazing person. Megatuce is one of the sweetest, funniest women I have ever had the pleasure of knowing and I have the world of nail art to thank for bringing us together! 

/end sappyness! 

Here is a shot of our nails side by side. Aren't hers just stunning? 


And here is a shot of what I used to create mine: 


The watermarble was done with OPI Kiss Me I'm Brazilian and Orly White Tips, and the heart details were free handed with white acrylic craft paint and a small detail brush from Michael's craft store. 

I am so happy to have had the opportunity to do this with Mega. And again, go check her out . You can find her on Instagram and on her BLOG. Her highly anticipated polishes should be releasing this month! 


Thursday, January 29, 2015

Nail Art January: match your outfit of the day!

Hey y'all! 


Today on the blog I have a watermarble for #nailartjan day 28: match your outfit of the day. I'm happy with how these turned out even though the pink isn't as vibrant as I wanted it to be. Here's what I used: 


Today I started with a new base - Essie protein base. I've been suffering from some peeling so I decided to give this a try. I will update and let y'all know how it goes! I painted my index, pinkie, and thumb with Zoya Dahlia and then top coated those with Seche Vite. I painted my middle and ring finger with Orly White Tips. While that was drying I placed liquid latex from Amazon around my two middle fingers to protect them when I watermarbled. Here's the container I have: 


I just use a q-tip to apply it. Once the latex dried, I used OPI Kiss Me I'm Brazilian and Zoya Willa for the marble. Here's what it looked like before the design: 


And then I drew in the water with a toothpick:


I pulled my finger out of the water slowly, peeled off the latex, and top coated with Seche Vite. Here's a macro of the marbled nail: 


And a final look at the finished mani: 


What do you think of this vampy watermarble?