Showing posts with label m polish. Show all posts

Monday, January 25, 2016

Nail Art: M Polish Oh Shit, That's Pretty!


Hey y'all! Today on the blog I have a mani using the latest M Polish group custom to share with you! Both times that Megan has done a group custom for us, she's had us submit names for the polish and vote amongst ourselves. Whoever's name gets the most "likes" gets a free full sized bottle of the custom. The funny store behind the name of this polish goes like this - one of the group admins posted a photo of the polish and instructed us to try to come up with names. We all started commenting with names and one girl said "Oh shit, that's pretty!" as a passing comment. Of course we all agreed with her and her comment got the most likes so she inadvertently won the naming contest. Thusly, Oh Shit, That's Pretty was born. Let me show you the mani I did with mine. 


I started with China Glaze Inner Beauty on my index, middle, and ring finger and LaqueredUp No Regrets on my pinkie. I added Revlon Holographic Pearls to all of my fingers to add some extra sparkle. Once that was dry, I stamped an image from UberChic Beauty 4-02 using M Polish Oh Shit, That's Pretty. I topcoated everything with KBShimmer Clearly On Top quick dry topcoat to seal everything in. My favorite thing about OSTP is the chameleon quality of it. It looks so different in different lighting and over different bases. You can see in my macro the shift between purple and blue.


The group customs are limited to purchase by M Polish Lovers group members only but you can join us so that you can get them in the future too! Each custom is a highly limited batch and once they're gone, that's it. Sometimes Megan brings them back because we beg her until she relents. Haha! 

What's your favorite M Polish? 

Thanks for reading!

Want to see more? Click below to connect with me!


Wednesday, December 9, 2015

Nail Art: Winter Themed Snowflake Nails!


Hey y'all! Today on the blog I am sharing some wintery themed nail art with you. I thought it would be nice to take a break from Christmas specific nail art for a bit. I love LOVE snowflakes. I love using them in nail art and hanging them on my tree at Christmas time. I live in Georgia so we rarely see snow. As such, I have a weird fascination with it that my friends in colder climates just don't understand! Anyway, I have two snowy manis to show you today, let's jump right in!

Let's start with one of my favorite and most sparkly manis of all time! I used three polishes from the M Polish Winter 2015 collection to make a gradient on my nail. I started with my favorite base coat - LynBDesigns B-Stronger. Once that was dry, I used a latex free makeup wedge that I cut in half to make it more the size of my nail. I placed Frost first, followed by Bells, and finally Carol so that my colors were lightest to darkest starting at my cuticle. Now if you've ever done gradient nail art before, you know that it usually take several passes with the sponge to get the blended look that you're going for. With these polishes...ONE FREAKING PASS! I did bounce the sponge up and down a few times but I never reloaded my sponge. This is one coat with the makeup wedge! I added a quick dry topcoat  - mine is KBShimmer Clearly On Top to protect my base from smudging when it came time to stamp.

Once my base was dry, I used my Creative Shop Stamper and scraper along with M Polish Figgy to stamp an image from a Cici&Sisi plate for the snowflake image. I sealed everything in with another round up topcoat and that's it! Let me show you the macro:


The other mani I have to show you is a little less glitzy, but only just. Its also a bit more abstract and less traditional snowflake. That's because the images I used are from Bundle Monster's most recent holiday set and the plate with the large snowflake images are too big for my tiny baby nails right now. Oh well! Onward and upward, I say! I stamped an image from BM-S213 using M Polish Copper over 2 coats of Powder Perfect Deshret. I'm not sure if this Powder Perfect is still available but if you can get your hands on it - DO IT! Its a garnet textured polish with scattered holo glitters in it and such a gorgeous base for winter manis! Garnet happens to be my birthstone so I think that's why I'm drawn to it. Since its textured, I did topcoat with one coat before stamping so that my stamping wouldn't look textured. I also topcoated the whole mani again after the stamping so in the end, my base didn't feel or look textured anymore. Check out the macro!


That's all I have to share with you today! Which mani was your favorite? What's your favorite winter design? 

Thanks for reading!

Want to see more? Click below to connect with me!


Monday, December 7, 2015

Nail Art: Poinsettia

Hey y'all! Today on the blog I have another Christmas themed mani to share with you. I drew my inspiration from the Christmas poinsettia centerpiece I have on my dining room table right now - its a mix of beautiful glitter red and gold poinsettia flowers in a somewhat rustic kind of basket so I just went from there. Searching through my plates left me a little disappointed in my choices for poinsettias but luckily I did find one on one of my UberChic Beauty plates! I have some more pictures to share with you and a list of steps to complete this mani. Let me show you! 


I started with two polishes for my base - Lorelei Lacquer Love Always for my red and M Polish Bells for my Gold. I did 2 coats of Love Always on my index and pinkie fingers and one coat of Bells on my middle two. I allowed those to dry and topcoated with KBShimmer Clearly On Top and waited until they had completely dried. While my base colors dried, I used M Polish Cayuga to stamp the outline of the flower from UberChic Beauty 3-02. I filled in the petals with Love Always and the center with Zoya Verushka. I let that dry on the stamper and topcoated it with KBShimmer Clearly On Top and let it sit until it was dry. Cue me checking Facebook and Instagram to kill time for about 7-8 minutes so I didn't rip my decals. :P 

Once my decals were ready to be pulled off the stamper, I added another heavy coat of topcoat to my nail, practically flooding my cuticles and gently laid the decal on top. I gingerly pressed it down so I didn't tear or smear my decal. I topcoated one more time to help the decal blend in with my base so it looked seamless. I learned this technique from @karma.and.polish on Instagram. Her stamping decals are always perfection! 

I also stamped another image from the same UberChic Beauty plate over Love Always on my index and pinkie finger to add a little dimension and to mimic the basket of my centerpiece. It didn't show as well as I would've liked, because holo on holo! Let me show you how my decal looked on my Creative Shop Stamper:


That's it for this nail art post. What do you think of this mani? What are your favorite Christmas colors?

Thanks for reading!


Want to see more? Click below to connect with me!

Monday, November 16, 2015

Swatch and Review: M Polish Winter 2015 Collection!

Hey y'all! Today on the blog I have the Winter 2015 collection from M Polish to share with you! I was lucky enough to receive these to swatch through Nail Blogger Roundabout and am so excited to show them to you. They're all so super gorgeous, glitzy polishes that are perfect for the holiday season, so let's jump right in! 


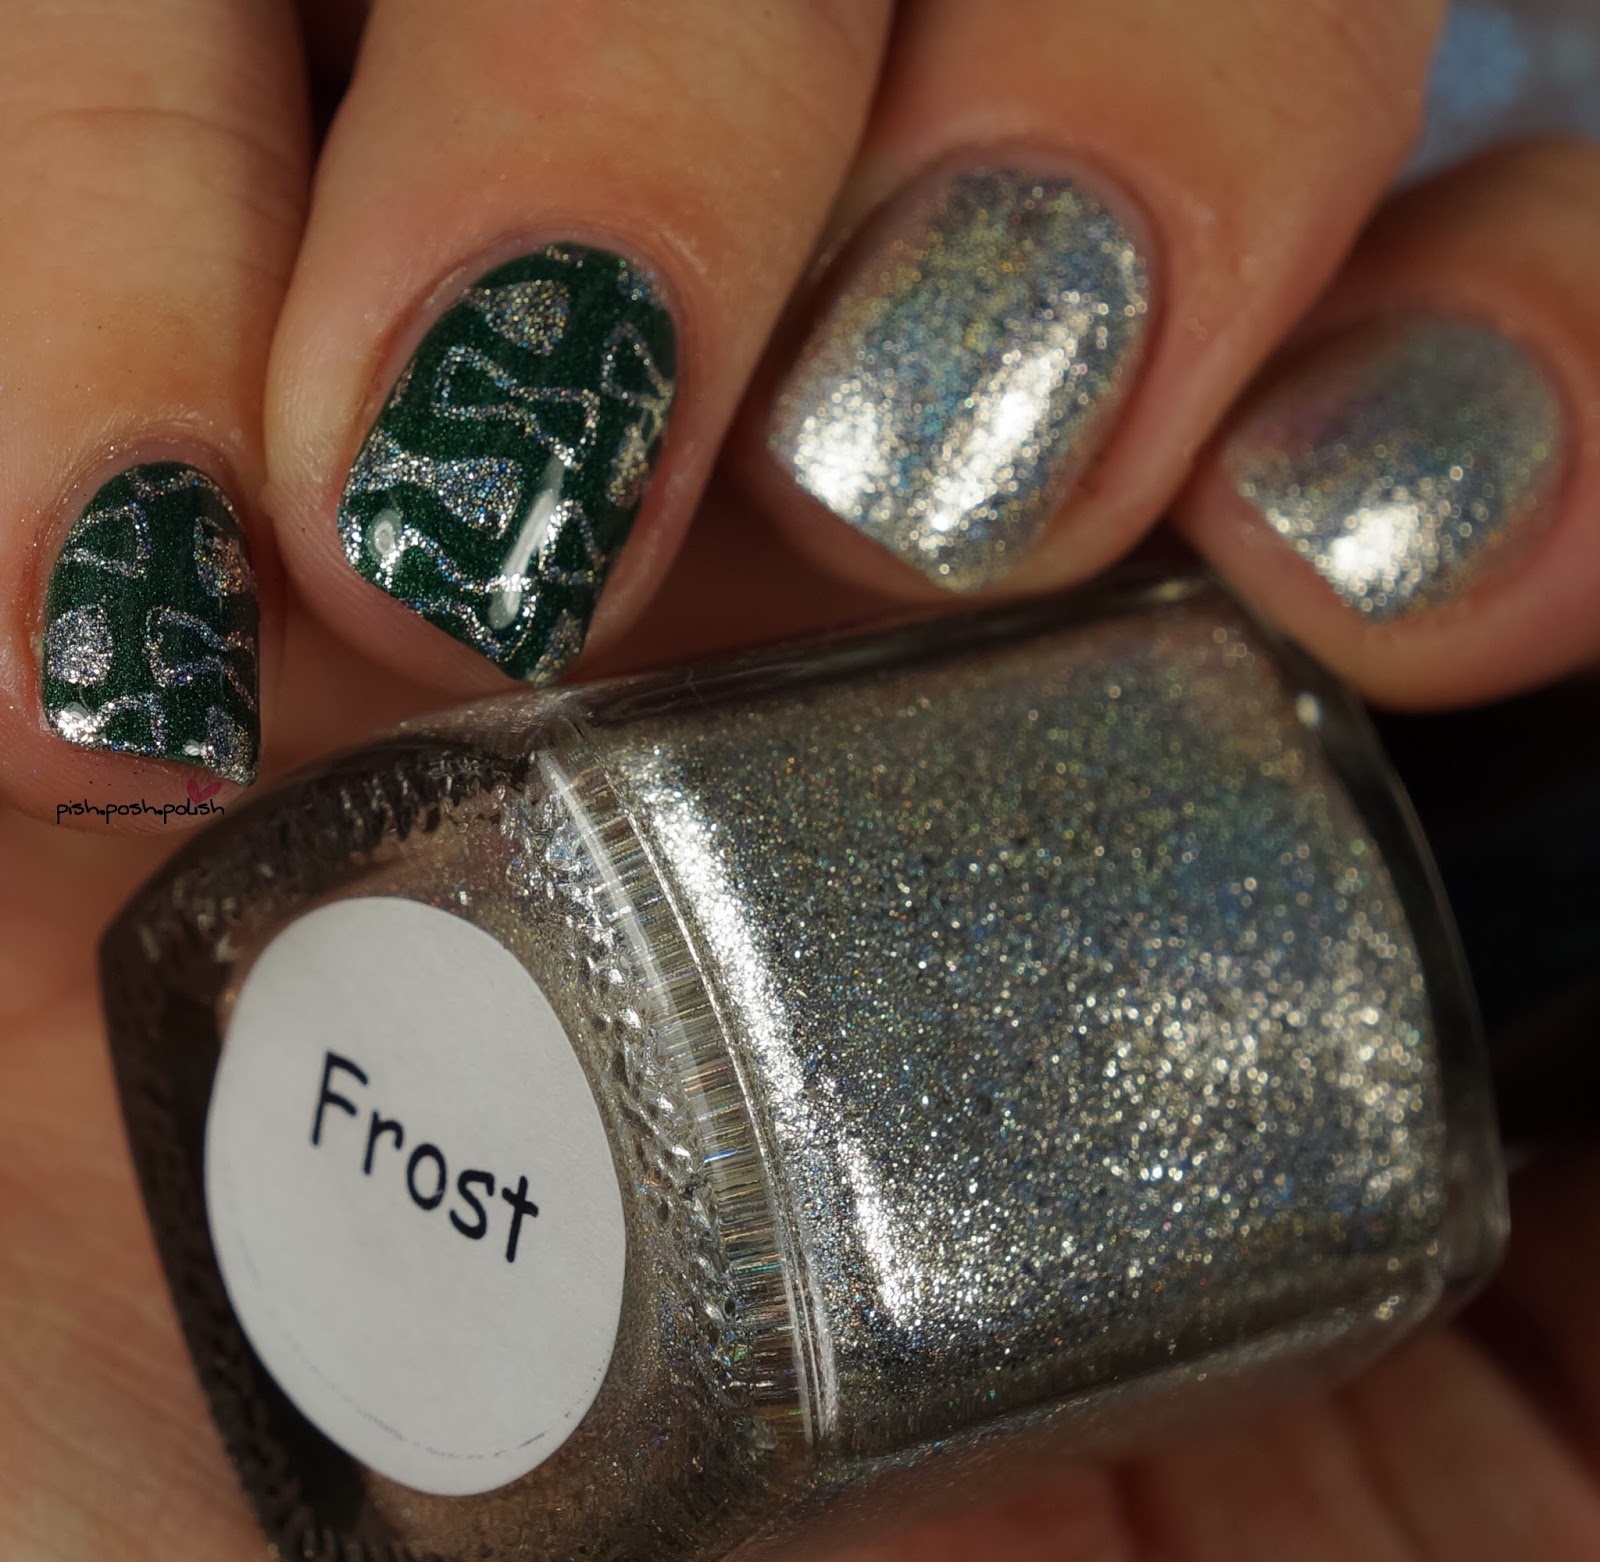
The first one that I swatched from the collection is Frost. Frost is a reflective, antiqued silver foil with holo shimmer throughout. So many finishes in one polish and they all translate to the nail - how amazing is that? One of the best things about the M Polish Winter collection is that although they are primarily stamping polish, they all can be used as regular polish with easy application! I applied Frost here in one easy coat on my index and middle fingers and stamped it over Zoya Verushka. The entire mani is topped with KBShimmer Clearly On Top. Because of the heavy amount of flakies in Frost, it was a little thicker to apply as a full coverage polish but it self leveled easily and the image stamped cleanly using my Creative Shop Stamper and the Cici&Sisi Holiday 2014 plate. 


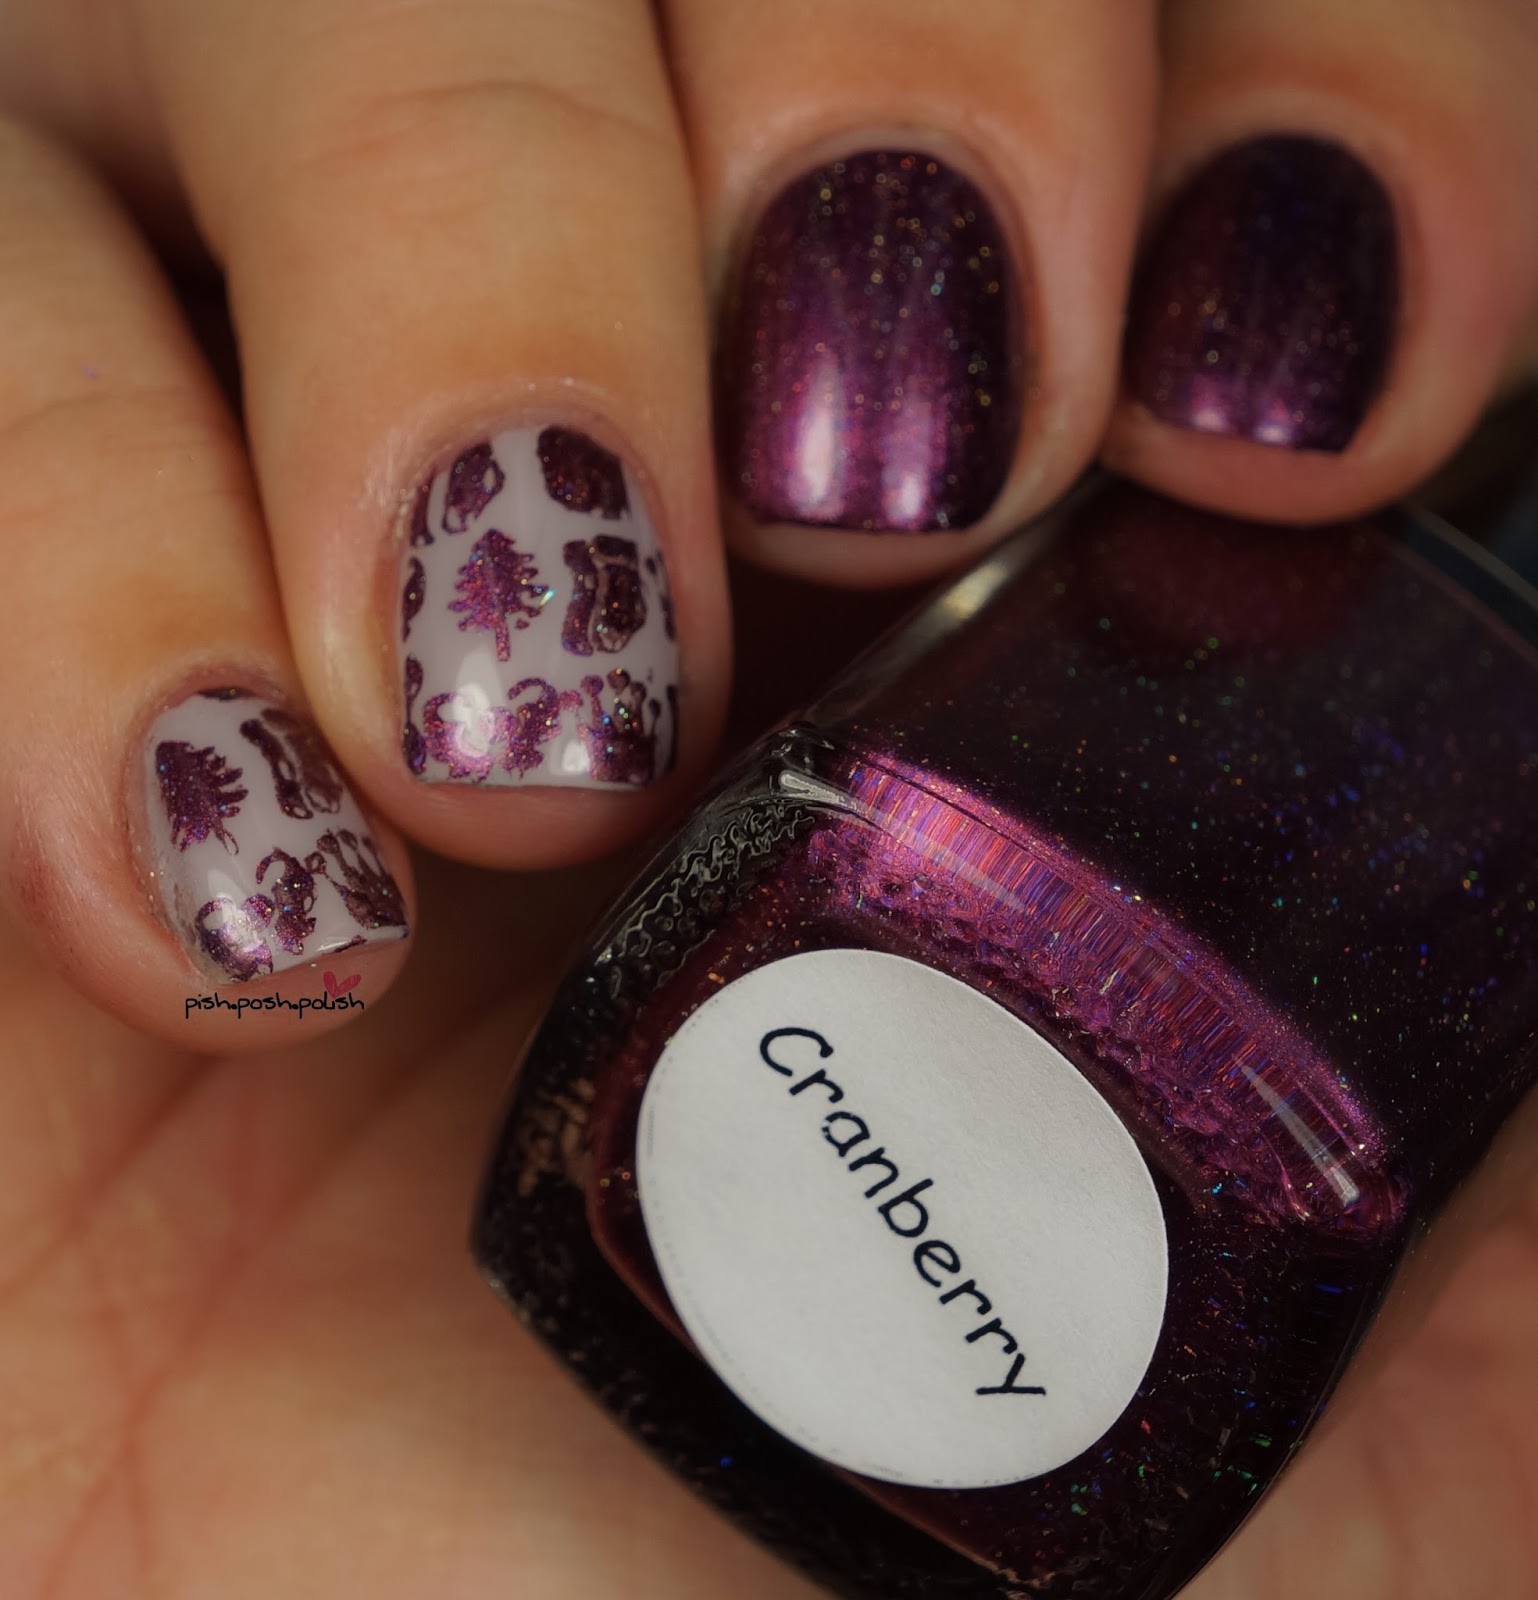
 The second polish I have to show you is Cranberry. Cranberry is a metallic pink toned purple with scattered holo glitter running throughout! The formula on Cranberry is similar to Frost but without the flakies in it. It applied in one easy coat for a full coverage polish on my index and middle fingers and stamped crisply on my ring and pinkie over Zoya Leah. The entire mani is topcoated with KBShimmer Clearly On Top.


 The next one I have to show you is Figgy, a royal blue toned purple metallic with holo shimmer running throughout. The formula and application on Figgy is identical to Cranberry - easy to apply as a full coverage polish with no brush strokes and the polish picked up and transferred easily using my Creative Shop Stamper. I stamped it here over LynBDesigns Fresh Fallen Snow and topped with Clearly On Top.


 Next up is the blue of the collection, Joy! You guys know how I feel about blue...Be still my heart! Joy is a blue metallic with scattered holo glitter running throughout. I feel like a broken record here but they all have easy formulas for both full coverage wear and for stamping! Joy has an identical formula to Cranberry and Figgy and applied easily with no brush strokes as a full coverage polish and stamped beautifully over KBShimmer In Bare Form using my Creative Shop Stamper.


 What would a Christmassy, wintery collection be without a true gold? Next up I have Bells, a yellow toned reflective gold foil with holo shimmer throughout. Can you even? I can't! I stamped it here over Madam Glam Red-Black. This one was a little thicker for application as a full coverage polish due to the heavy amount of flakies but it self leveled and smoothed over with topcoat. Stamping was a breeze with Bells using my Creative Shop Stamper and the Cici&Sisi Holiday 2014 plate.


Lastly is my second favorite (after Frost!) - Carol! Carol is another beautiful reflective foil with holo shimmer but this time in a coppery shade. Just like Bells and Frost, it was a bit on the thicker side for full coverage application but I only needed one coat and it self leveled well. My images picked up cleanly using my CSS. I stamped it here over Zoya Sailor and topped with KBShimmer Clearly On Top. 


This stunning collection launches TODAY at noon CST at mpolishes.com! The entire collection can be purchased in full size for $60 or mini size for $24. Individually the polishes retail for $10.50 for full size and $4.25 for mini size. You can also follow M Polish on Instagram for more swatches and news on the release! 

Which is your favorite? Are you excited for this collection? 

Thanks for reading! 


Monday, September 14, 2015

Pink For Rebecca Collab


Hey y'all! Today on the blog I have a collab mani to share with you. A group of my nailie friends came together in secret to do pink/breast cancer support manis for our friend, Rebekah who walked this past weekend in the Avon Breast Cancer Walk. Rebekah lost her best friend, Annette last year to breast cancer and decided very shortly after that she wanted to do something to honor her. The Avon walk has taken a year for Rebekah to train for, which has been no easy task for her but she's done it! In fact, I just saw her write about it on Facebook - she walked 26.1 miles on Friday! I am in awe of her love for Annette, her diligence and dedication to the walk, and her success in completing what she set out to do. You're an amazing woman and friend, Rebekah! Much love to you. 


There were 39 of us that participated in the collaboration, which was organized by @polished_ink. You should go check out all the others that participated, they're all incredible. Click on the collage photo above to hop over to Instagram where you can see all of our manis! 

Thanks for reading! 


Want to see more, click below to find me on social media!

Wednesday, September 2, 2015

Black stamping polish from bornprettystore review


Hey y'all! Today on the blog I have a review of the Temix black stamping polish from bornprettystore to share with you. This is a pretty good black stamping polish in terms of quality but I do have a few reservations about it, so let's jump right in and I'll let you know all of my thoughts! 


First impressions about this polish were that its consistency and formula were pretty standard for a stamping polish. I found the polish to be very thick and inky, which is to be expected from a creme stamping polish. I was slightly off put by the smell - the only other polishes I stamp with are either regular nail polish or M Polish stamping polishes, neither of which have a very strong smell in comparison. Temix has a smell more similar to Seche Vite or other polishes that are not 3 free. That being said, I do not know the ingredients of this polish nor is it listed on the sight. I did email my contact at BPS to see if she could find out but she was unsure and told me that they would update the website when possible to reflect the ingredients list. 

As far as actual stamping goes, Temix kinda hit right in the middle for me - while definitely more opaque than nail polish, it didn't play nicely with my Creative Shop stamper, and I had to use a sticky marshmallow stamper in order to be able to pick up an image without patchiness. The polish worked wonderfully with my marshmallow stamper but considering not everyone owns multiple stamping heads, I can imagine that this polish might be frustrating for some to use. 

The image transferred nicely to my nail - in this case I used it to make a decal. The other polishes didn't smear the black around when I was filling in my image, nor did my topcoat smear the black image either. 

Overall - I didn't really have issues with this polish and do think it works well, but it bothers me that I don't know the ingredients, particularly in light of the nail communities recent issues in transparency with another brand (looking at you, Mentality!) and I don't like that I can't use my preferred stamper with it. If you'd like to see a more in depth review and demo, check out my live demo on Youtube. 


If you're interested in purchasing this polish, you can find it HERE. Don't forget to use my code, PPPQ10 for 10% off your orders! 


Thank you for reading!


**Want to see more? Follow all of my social media to see more nail art and swatches!

Bornprettystore rose stamping plate review!

BP-73
Hey y'all! Today on the blog I have a review of a round stamping plate from bornprettystore.com to share with you. As per usual with these round BPS plates - I was very happy with the quality of this plate. Along with the cohesiveness of the plate, the etching was deep on all of the images which means a clear image upon pickup! YAS! Let's jump right into the specifics of the plate, how my mani turned out, and where you can find this little guy! 


BP-73 from bornprettystore.com with blue plastic film
BP-73 from bornprettystore.com after blue film was removed 
The theme of this plate is ROSES! I was drawn to this plate because I feel like roses can be used in a multitude of different mani ideas, adding a classic and beautiful twist to your nails. This plate in particular is nice because it can be used just for the outline, for advanced stamping decals, or for lead lighting purposes. With such a versatile plate - the possibilities are endless, making this plate good for any stamping lover. 

I started out with a base of Lorelei Lacquer Hypnotic on my middle and pinkie, and Liquid Chrome by Shinespark Polish on my index and ring. Once my base was dry on the index and ring, I stamped the image from the top middle of the plate using M Polish Cayuga and my Creative Shop Stamper from whatsupnails to create the base for my rose lead lighting. Once my stamping outline was dry, I went back in with Shinespark Ballerina Bunny and Max Splash from the 90's Kids Collection to create the color on the petals on the roses. Once that was dry, I top coated with Seche Vite and that's it! 

I highly recommend this plate for anyone that enjoys that floral look in your manis - especially if you love making stamping decals. If you'd like to pick this plate up, you can find it HERE. Don't forget to use my code, PPPQ10 for 10% off your order of originally priced items! 


What do you think of this mani? Do you like rose images?

Thanks for reading!


**Want to see more? Follow all of my social media outlets to see more nail art and swatches!**