Showing posts with label lynbdesigns. Show all posts

Sunday, May 1, 2016

Swatch and Review: LynBDesigns Staycation Collection


Hey y'all! Today on the blog I have the Staycation Collection from LynBDesigns to share with you. This 9 piece collection consists of 8 cremes and 1 glitter topper. Each of the creme shades is a pastel or "bleached" neon color which is super fun for the upcoming summer season and the glitter topper is a fun addition to the collection! I have a ton of photos to share with you so I'm going to jump right in to the swatches. 


Oahu is a pastel magenta creme. I did have to add a few drops of thinner to this one because it was on the thicker side and somewhat difficult to apply to my nail. After the thinner it applied much easier in two coats - one thin coat and one thicker coat. Oahu has more of a crelly formula than a creme formula so it applied patchy on the first coat and leveled out on the second coat. All of my photos show two coats plus KBShimmer Clearly On Top quick dry topcoat.


Rio is a pastel pink neon creme that rivals the pinkest of Barbie pinks. I added a few drops of thinner to this one as well due to it being on the thicker side. Rio also has a crelly formula so the first coat is streaky and the second coat makes it opaque and the topcoat levels it out. All of my photos show two coats plus topcoat.


Miami is a soft coral neon creme. The color of Miami reminds me a lot of photos of China Glaze Flip Flop Fantasy that I have seen. I don't own it personally to compare but its at least similar in color. Miami was also on the thicker side but a few drops of thinner fixed it right up. Despite some formula issues, Miami made it to my top 3 favorites of this collection. I applied it in one thin coat and one thick coat as I did the others and the topcoat leveled it out. My photos show two coats plus topcoat. 


Cabo is a pastel orange neon creme that reminds me of a creamsicle pop. Cabo needed a couple of drops of thinner as well but applied in two coats and smoothed out with topcoat. Cabo was another favorite for me - I usually don't love oranges or yellows against my skin tone but this one looked lovely. My photos show two coats plus topcoat. 


Bondi is a pastel yellow neon creme that is super vibrant and in your face bright. Bondi had a great formula for me - still a crelly formula but smooth and not thick at all. I applied one thin coat that was a bit patchy but leveled out and became opaque on the second coat. All of my photos show two coats plus topcoat. 


Santorini is a pastel green neon creme. Formula and application were like Bondi - smooth and not thick at all. Santorini is still more like a crelly than a true creme but it applied in two coats for full opacity. All of my photos show two coats plus topcoat. 


Ibiza is a pastel blue neon creme. Y'all....YOU GUYS. This one is my number one favorite - but those of you that have followed me for a while would have already guessed that. Ibiza is blue and blue nail polish = the best nail polish. Ibiza's formula was identical to Santorini and Bondi - a crelly like formula but opaque in two coats. All of my photos show two coats plus topcoat. 


Eluthera is a pastel purple neon creme. It is the final creme in this collection and rounds out the full ROYGBIV color spectrum nicely. Eluthera a nice and easy crelly like formula. All of my photos show two coats plus topcoat. 


Bora Bora is a clear galaxy holo topper. It was a bit tricky to catch on camera as it is very scattered and subtle but in person, its a beautiful chameleon - looking iridescent in artificial light but catching the fire of the holo in direct sun. I applied one coat over black in my photos and added topcoat. 

If you're interested in seeing the live swatch and review I did on this collection you can click below to head to my Youtube channel:


Overall thoughts on this collection are: the first half of the collection was a bit tricky for me and required a few drops of thinner but I've seen other reviews of this collection and most of the other ladies reviewing it didn't seem to have the same issues that I did. It is possible that maybe my bottles were slightly open during shipping and thats why they were thicker. Either way - the colors are gorgeous and the second half of the collection performed well for me. If this is your first neon collection - the pinks and the orange may be frustrating to apply if yours are like mine. I do have to say that Jennalyn of LynBDesigns has incredible customer service and I can rest assured knowing that if I had purchased this collection on my own and was unhappy with it that she would do everything to rectify the problem. Last thing to mention - these dry super fast. I mean, lightening fast. 5 minutes or less so unfortunately they do not water marble but the plus side is that you don't have to wait a long time for them to be dry. And I think that's it for my final thoughts. 

If you'd like to pick up this collection, they will retail for $6 each or $50 with free shipping (US only) for the entire 9 piece collection. The Staycation Collection launches May 6th, 2016 at 7pm EST in the LynBDesigns store. You can also follow LynBDesigns on Instagram and Facebook for more swatches or join us in the LynBLoves Facebook group for exclusive looks into further collections and news about current sales and collections. 


Thanks for reading, 


Saturday, April 23, 2016

Product Review: bornprettystore holo vinyls

Hey y'all! I'm back today to share some nail art and my review of some nail vinyls from bornprettystore. Daaaaamn Pish! Back at it again with the bornpretty reviews! Yeahhhh...its been a while but things were just so flippin' crazy for a while with the move. We only moved 30 minutes away but its no joke getting your house on the market and buying a new one while selling your old one! 

Anyway, I was approached by bornprettystore.com to start reviewing again and decided to go ahead wth it. These pretty little holo vinyls were the first thing I decided to try. Now, I know what you're thinking - whats the point of them being holographic if they're just vinyls? Well I think in a perfect world, you're supposed to cut them down to fit on your nail and leave them there like decals but ain't nobody got time fo dat. At least, *this* nobody ain't. I knew as soon as I got them that I was just going to use them like full nail stencils because that just made more sense to me. I included a short tutorial on Instagram that I'll put down below. If you want to read how I used these, keep reading.

BPS Item# JV211


I started with a base of Vapid's Surprise! I'm Drunk and topcoated in preparation for the vinyls. Your base should be 100% dry before attempting to use any vinyls whatsoever, otherwise the vinyl will pull your base color up. Yuck, no one wants that. Its happened to me - cue throwing things across my office. Once my base was dry, I cut along the borders of the vinyls and removed them from the plastic backing. I touched the vinyl to the back on my hand to remove some of the stickiness and then placed it on my nail. I pushed down to make sure that it was completely in contact with my nail surface and then placed some liquid latex (Vapid's Catsuit) around my cuticle before sponging on my color. I used a regular latex free makeup sponge cut to size to sponge on the coral polish (LynBDesigns Miami) until it reached opacity. I immediately removed the vinyl and the latex to reveal my design. Once it was dry, I topcoated again to seal everything in. The index and pinkie are just a couple of dots that I did with my dotting tools. Boom! Fancy nail art! 


A couple of things to note about these vinyls - they're a bitch to get off the plastic backing. I recommend doing it before you paint your nails and just stick them to the top of a polish bottle or your acetone or something because once your nails are painted, you don't want to have to pick these suckers off the backing. They're pretty thin and don't have much structure to them once the back is off so smoothing them down was a bit of a struggle. They do come pre-weeded (the negative space was already there) so that's a plus! Additionally, because they're nice and thin, theoretically you could use them as a decal and topcoat them but I didn't try that myself. They're also only $2 for a sheet of 12. 


If you'd like to pick up these vinyls, you can find them HERE. You can use my code PPPQ10 for 10% off any regularly priced items. 


Thanks for reading! 


Monday, March 28, 2016

Swatch and Review: LynBDesigns Tudor Roses Collection!


Hey y'all! I'm still mostly on hiatus due to the move which is happening in just over a week, but I am here today to share the newest collection from LynBDesigns! The Tudor Roses collection is a special one because its a collaboration with one of my fellow bloggers, Jenn from TheJediWife! This gorgeous collection draws inspiration from the wives of King Henry VIII, each being beautiful and unique in her own way. There are 7 polishes in this collection so I'm going to jump right in! 

Jane Seymour in direct artificial lighting
Jane Seymour in direct sunlight  
Jane Seymour macro
First up is Jane Seymour, a dove grey crelly base with a hint of blue shimmer, golden flecks, and gold micro glitter. The formula is a bit on the thicker side but application was easy and self leveled well. I did one thin coat and a second thicker coat to achieve opacity. The blue shimmer made this polish
pull a faint lavender against my skin. This is one that is perfect for spring!

Katherine Howard in direct artificial lighting
Katherine Howard in direct sunlight 
Katherine Howard macro
Next up is Katherine Howard, a light pink base loaded with silver and golden shimmer. Formula and application were both a breeze with this one, each coat self leveling nicely. This is another one that pulled more lavender against my skin tone. I used two coats plus topcoat. 

Anne Boleyn in direct artificial lighting 
Anne Boleyn in direct sunlight
Anne Boleyn macro
Anne Boleyn is a blood red jelly base filled with linear holo. red micro glitter, and hidden red shimmer. Easily my favorite of the collection, Anne Boleyn is very unique to my collection. The holo is very strong in direct sunlight and the red micro glitter really shines in artificial lighting! Formula and application were easy on this one as well. I used two coats plus topcoat.

Anne of Cleves in direct artificial lighting
Anne of Cleves in direct sunlight
Anne of Cleves macro 
Anne of Cleves is a taupe base loaded with golden shimmer, gold galaxy holo, and peachy pink glass flecks. My second favorite of the bunch due to its originality! Formula was a bit of the thicker side but easy to work with. Application was smooth and self leveled well. You can really see the peachy pink flecks in my macro shot! I used two coats plus topcoat.

Catherine Parr in direct artificial lighting 
Catherine Parr in direct sunlight 
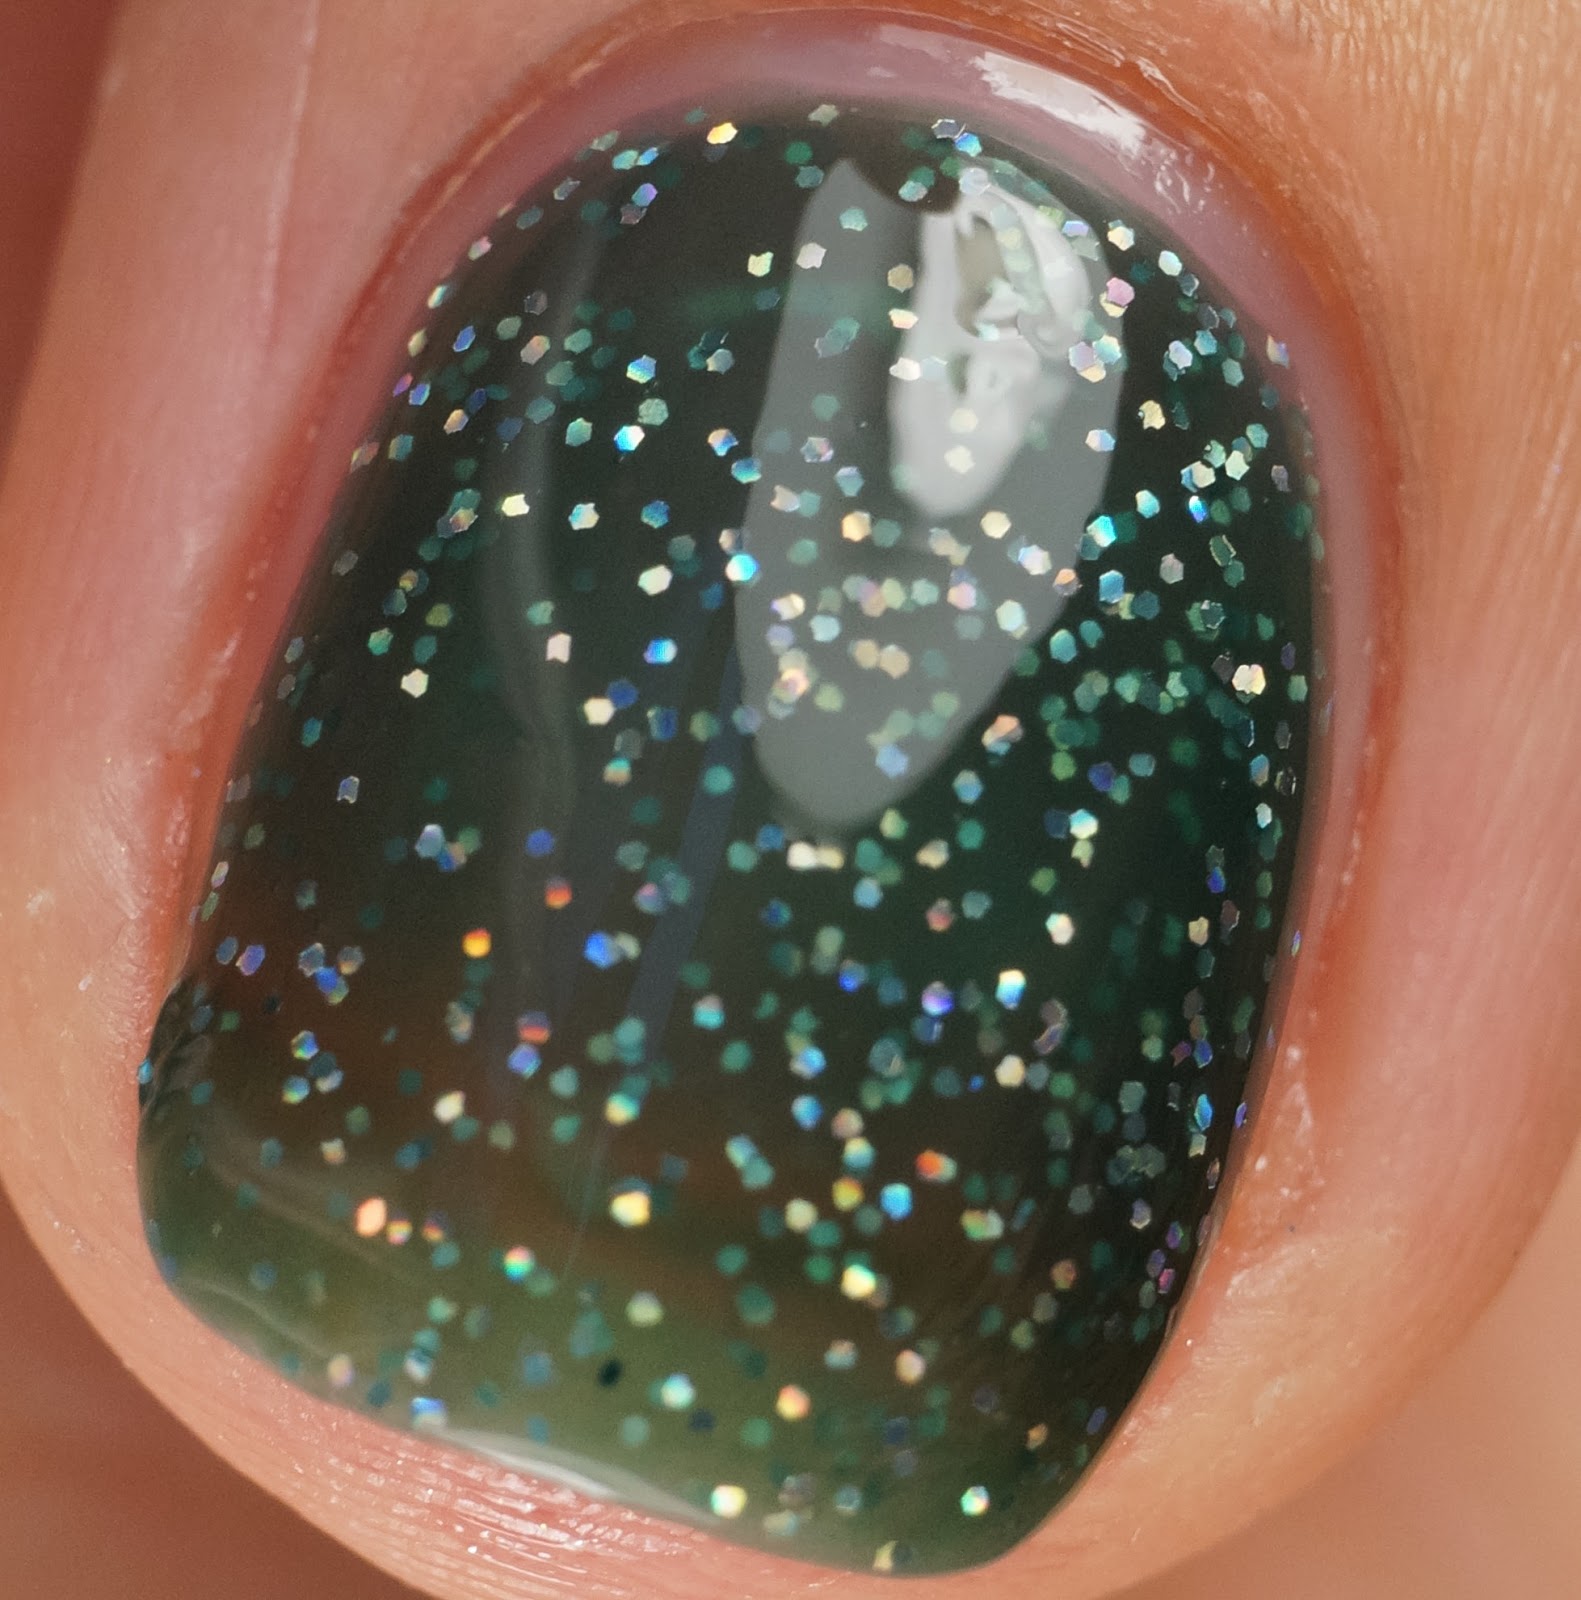
Catherine Parr macro
Catherine Parr is a forest green crelly base with silver galaxy holo glitter. This one is so beautiful but totally a chameleon for me! I really struggled to get it to photograph accurately in the sun because it leans more teal in direct sunlight. I tried different angles, different times of day and my camera kept making it teal. Nevertheless, a gorgeous polish. Formula and application were smooth - I used one thin coat and one thick coat plus topcoat.

Tudor Rose in direct artificial lighting
Tudor Rose in direct sunlight
Tudor Rose macro
Tudor Rose is a mixture of gold, green, and red flecks with white, red, and burgundy glitter all mixed together in a clear base. Tudor Rose is meant to wear as a topper, though it can be built up in about 3 coats if you dab the glitter closer to the tip of your nail. I did find the base to be a bit thick but it was to be expected with the amount of glitter packed into this gorgeous topper. None of the glitters in my bottle sank or required fishing to get out - the benefits of a thicker base. I layered one coat over a grey-white base to showcase all off the goodness going on in Tudor Rose. 

Katherine of Aragon in direct artificial lighting 
Katherine of Aragon in direct sunlight
Katherine of Aragon macro
Last in the Tudor Roses collection is Katherine of Aragon, a royal purple crelly base with hidden golden shimmer and intense linear holo. One of my other favorites of this collection because the holo is apparent even in artificial lighting! I love a good purple holo and the added golden shimmer makes this one a must have, in my opinion. Formula and application were a breeze for Katherine of Aragon. I used two coats plus topcoat. 

The Tudor Roses collection releases April 1st at 7pm EST in the LynBDesigns store. Katherine of Aragon and Anne Boleyn retail for $10 each and the others are all $8 each. You can find out more info for future releases and more swatches for this collection on the LynBDesigns Instagram, Facebook, and Facebook Fan Group

Which one is your favorite? Are you a fan of collections based on history? I know I am! 

Thanks for reading!