Friday, December 11, 2015

Swatch and Review: Back In The Abbey by LynBDesigns!


Hey y'all! Today on the blog I have the latest collection by LynBDesigns to share with you! Spoiler alert - I can't even with this collection! I was thrilled when Jennalyn asked me to swatch for her again as I love her polishes and this collection is no exception. Called Back In The Abbey - this collection is heavily inspired by a fan favorite show, Downton Abbey. I have quite a few pictures to share with you, so let's get started!


First up is I'd Like To Call Her Sybil, a pink jelly filled with pink and gold flakes and scattered holo shimmer. My swatch shows two coats plus Orly Sec N' Dry topcoat. The formula was a little on the thicker side but application was a breeze. Both coats self leveled easily and dried to the touch in about 5 minutes.


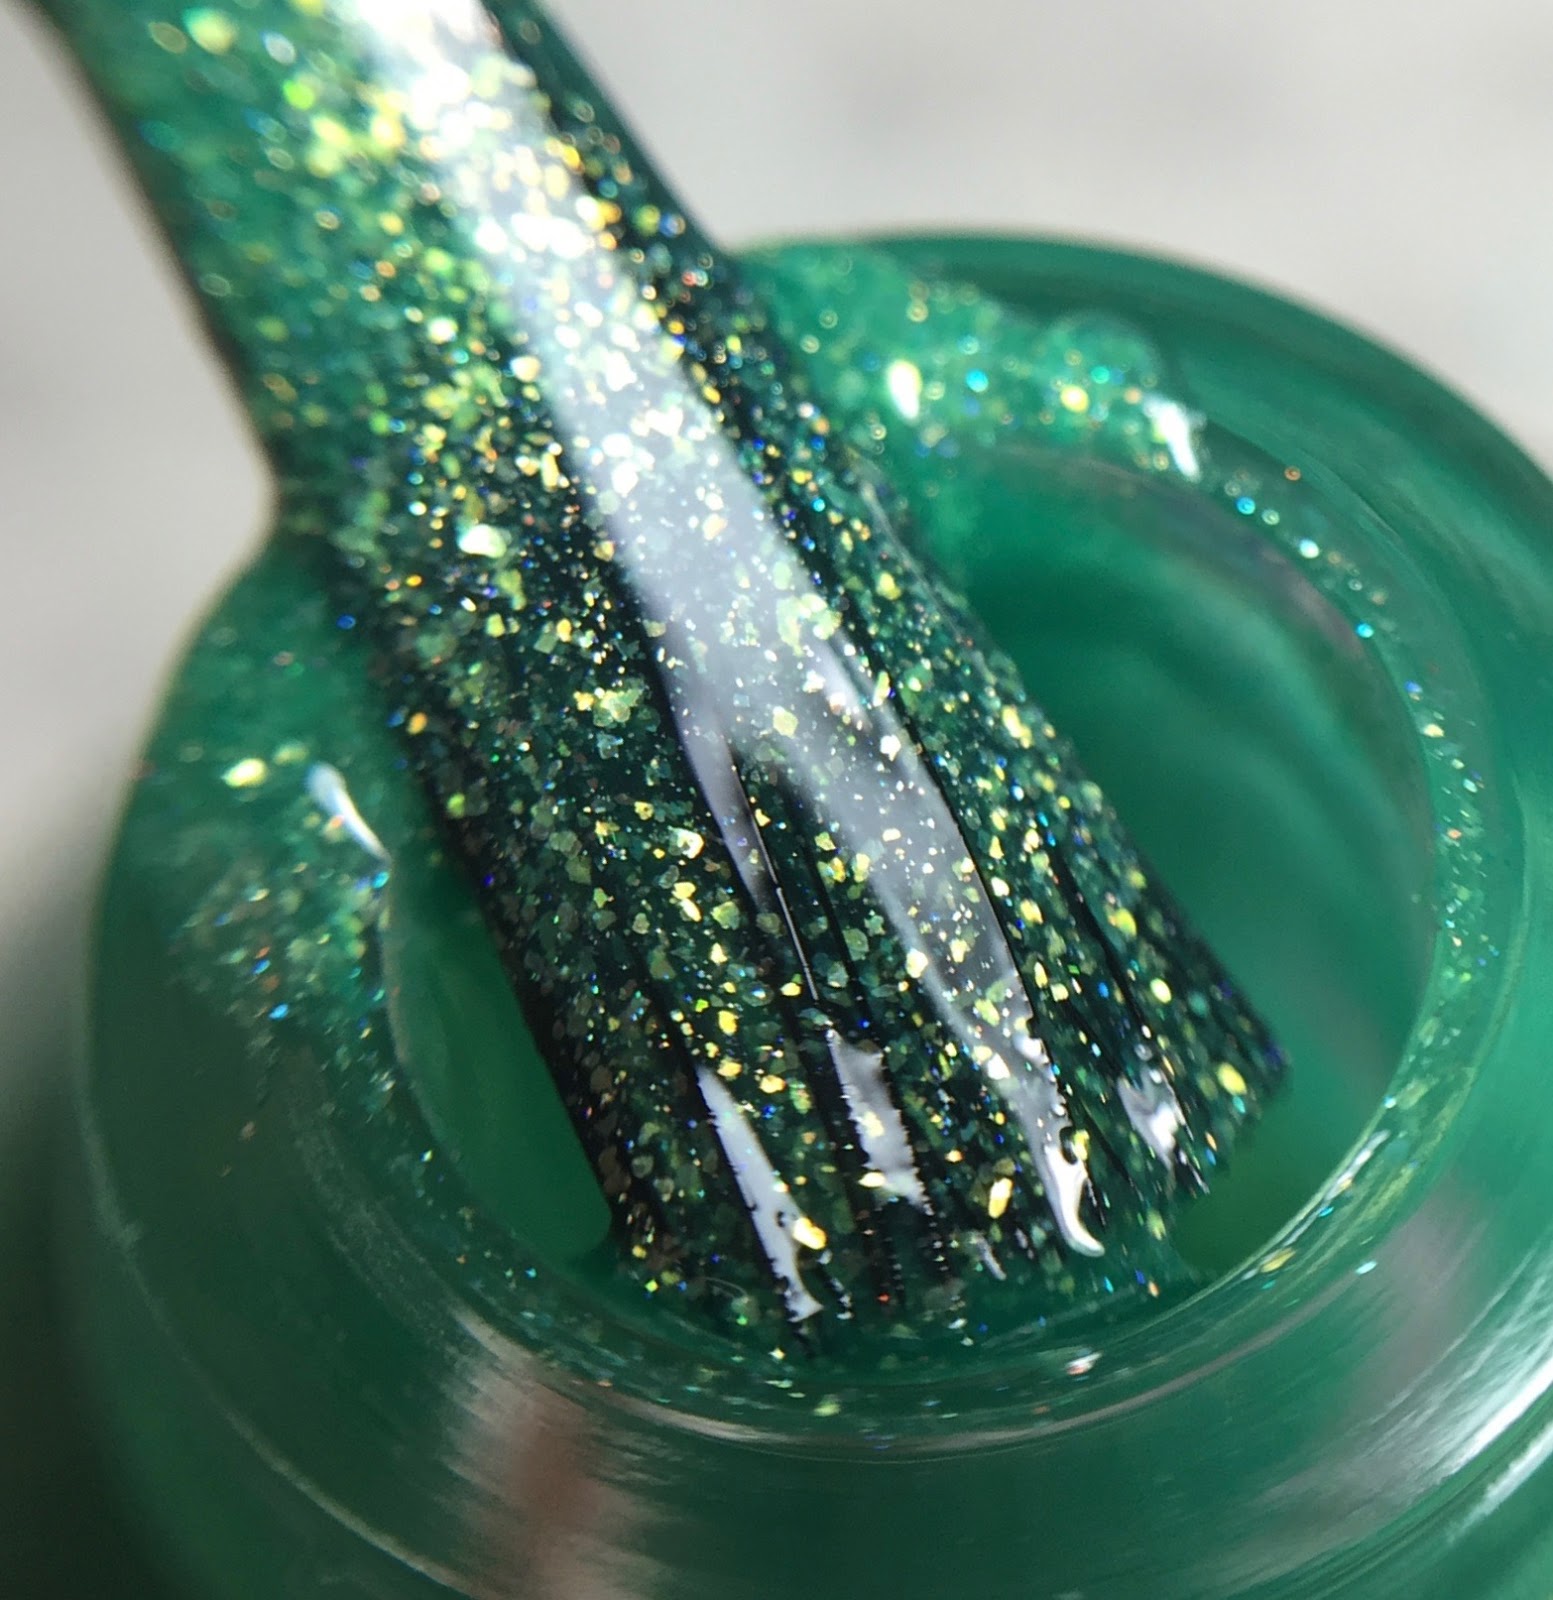
Next up is Master George, a green jelly filled with green/gold shifting flakes and holo shimmer. My swatch shows two coats plus Orly Sec N' Dry topcoat. The formula on Master George is similar to I'd Like To Call Her Sybil and was a tad on the thicker side but had a very manageable application. The formula self leveled easily and dried to the touch in about 5 minutes.


Next up is Vain And Silly Flirt, a blue jelly filled with blue holo flakies, and purple and holo shimmer. My swatch shows 2 coats plus Orly Sec N' Dry topcoat. The formula on Vain And Silly Flirt was absolute perfection and application was so easy! The formula self leveled very nicely and dried to the touch in about 5 minutes.


Golden Marigold is a bronze-y jelly base filled with copper/gold shifting flakies and holo shimmer. My swatch shows two coats plus Orly Sec N' Dry topcoat. The application was smooth and buttery on Golden Marigold, no thickness issues whatsoever. It self leveled nicely and dried to the touch in about 5 minutes.


The brown of the collection is Grandpa Donk - a grey leaning brown jelly filled with iridescent purple flakies, copper flakies, and holo shimmer. This polish is so beautiful and unique! My swatch shows 3 coats plus Orly Sec N' Dry topcoat. The formula on Grandpa Donk was more of a traditional jelly formula, still showing VNL on two coats which is why I added a third. It self leveled beautifully and dried to the touch in about 5 minutes.


The final polish I have to show you from the collection is Topsy Turvy World. How do we describe this one? A deep green/gold shifting linear holographic is the best I can do! It reminds me a lot of OPI What Wizardry Is This except with holo and no texture. This color is absolutely stunningly beautiful and that makes Topsy Turvy World my second favorite in the collection. My swatch shows 2 easy coats plus Orly Sec N' Dry topcoat. The formula was complete perfection. It applied like a dream and self leveled nicely. 

The Back At The Abbey collection launches January 1st, 2016 at 7pm EST on the LynBDesigns website. The entire collection will retail for $45 with free shipping within the US. If you purchase them individually, Grandpa Donk is $8 and the rest retail for $10. You can also follow LynBDesigns on Instagram and Facebook for more information about the release. Join us in the LynB Loves group on Facebook for the most up to date information! 

Which one is your favorite? 

Thanks for reading!

Want to see more? Click below to connect with me!


Wednesday, December 9, 2015

Nail Art: Winter Themed Snowflake Nails!


Hey y'all! Today on the blog I am sharing some wintery themed nail art with you. I thought it would be nice to take a break from Christmas specific nail art for a bit. I love LOVE snowflakes. I love using them in nail art and hanging them on my tree at Christmas time. I live in Georgia so we rarely see snow. As such, I have a weird fascination with it that my friends in colder climates just don't understand! Anyway, I have two snowy manis to show you today, let's jump right in!

Let's start with one of my favorite and most sparkly manis of all time! I used three polishes from the M Polish Winter 2015 collection to make a gradient on my nail. I started with my favorite base coat - LynBDesigns B-Stronger. Once that was dry, I used a latex free makeup wedge that I cut in half to make it more the size of my nail. I placed Frost first, followed by Bells, and finally Carol so that my colors were lightest to darkest starting at my cuticle. Now if you've ever done gradient nail art before, you know that it usually take several passes with the sponge to get the blended look that you're going for. With these polishes...ONE FREAKING PASS! I did bounce the sponge up and down a few times but I never reloaded my sponge. This is one coat with the makeup wedge! I added a quick dry topcoat  - mine is KBShimmer Clearly On Top to protect my base from smudging when it came time to stamp.

Once my base was dry, I used my Creative Shop Stamper and scraper along with M Polish Figgy to stamp an image from a Cici&Sisi plate for the snowflake image. I sealed everything in with another round up topcoat and that's it! Let me show you the macro:


The other mani I have to show you is a little less glitzy, but only just. Its also a bit more abstract and less traditional snowflake. That's because the images I used are from Bundle Monster's most recent holiday set and the plate with the large snowflake images are too big for my tiny baby nails right now. Oh well! Onward and upward, I say! I stamped an image from BM-S213 using M Polish Copper over 2 coats of Powder Perfect Deshret. I'm not sure if this Powder Perfect is still available but if you can get your hands on it - DO IT! Its a garnet textured polish with scattered holo glitters in it and such a gorgeous base for winter manis! Garnet happens to be my birthstone so I think that's why I'm drawn to it. Since its textured, I did topcoat with one coat before stamping so that my stamping wouldn't look textured. I also topcoated the whole mani again after the stamping so in the end, my base didn't feel or look textured anymore. Check out the macro!


That's all I have to share with you today! Which mani was your favorite? What's your favorite winter design? 

Thanks for reading!

Want to see more? Click below to connect with me!


Monday, December 7, 2015

Nail Art: Poinsettia

Hey y'all! Today on the blog I have another Christmas themed mani to share with you. I drew my inspiration from the Christmas poinsettia centerpiece I have on my dining room table right now - its a mix of beautiful glitter red and gold poinsettia flowers in a somewhat rustic kind of basket so I just went from there. Searching through my plates left me a little disappointed in my choices for poinsettias but luckily I did find one on one of my UberChic Beauty plates! I have some more pictures to share with you and a list of steps to complete this mani. Let me show you! 


I started with two polishes for my base - Lorelei Lacquer Love Always for my red and M Polish Bells for my Gold. I did 2 coats of Love Always on my index and pinkie fingers and one coat of Bells on my middle two. I allowed those to dry and topcoated with KBShimmer Clearly On Top and waited until they had completely dried. While my base colors dried, I used M Polish Cayuga to stamp the outline of the flower from UberChic Beauty 3-02. I filled in the petals with Love Always and the center with Zoya Verushka. I let that dry on the stamper and topcoated it with KBShimmer Clearly On Top and let it sit until it was dry. Cue me checking Facebook and Instagram to kill time for about 7-8 minutes so I didn't rip my decals. :P 

Once my decals were ready to be pulled off the stamper, I added another heavy coat of topcoat to my nail, practically flooding my cuticles and gently laid the decal on top. I gingerly pressed it down so I didn't tear or smear my decal. I topcoated one more time to help the decal blend in with my base so it looked seamless. I learned this technique from @karma.and.polish on Instagram. Her stamping decals are always perfection! 

I also stamped another image from the same UberChic Beauty plate over Love Always on my index and pinkie finger to add a little dimension and to mimic the basket of my centerpiece. It didn't show as well as I would've liked, because holo on holo! Let me show you how my decal looked on my Creative Shop Stamper:


That's it for this nail art post. What do you think of this mani? What are your favorite Christmas colors?

Thanks for reading!


Want to see more? Click below to connect with me!

Tuesday, December 1, 2015

Swatch and review: My World Sparkles Lacquers winter polishes!


Hey y'all! Today on the blog I have a couple of winter polishes from My World Sparkles Lacquers to share with you! Elizabeth was also kind enough to include one of her Pamper Gems for me to review as well so that will be included in this post. This was my first time trying anything from her brand and I was completely blown away last night when I was swatching! I can't wait to show you so let's jump in! 

Red Velvet is a medium toned red creme with pink flash. Formula wise, Red Velvet is perfection. I applied 2 thin coats easily without any pooling in my cuticles or polish running down my brush. It self leveled nicely between coats and dried to the touch in about 5 minutes. The color stunning and a slightly different way to wear red during the holiday season. I'm feeling some Mrs. Claus nails using Red Velvet as a base since it has the pink flash! 

Red Velvet in direct artificial lighting
Red Velvet in indirect artificial lighting
Macro of Red Velvet

Winter Blues is a cool toned denim blue polish with subtle holo shimmer and may be a new contender for my top favorite blue polishes ever.  While the finish might not be terribly unique, there is something about Winter Blues that made me feel beautiful when I put it on. (and I'm still wearing it now!) The formula and application for Winter Blues was nothing short of perfection. ONE beautiful, buttery coat that self leveled nicely and dried in about 5 minutes. It dried to a satin-y finish but that was easily rendered with a glossy topcoat which brought out more of the sparkle! If you want to try something from My World Sparkles Lacquers and you're not sure which to start with, Winter Blues is one I cannot highly recommend enough!

Winter Blues in direct artificial lighting
Winter Blues in indirect artificial lighting
Macro of Winter Blues 
The last thing I have to show you is the Peppermint Pamper Gem. Firstly, can we just stop to adore that she calls them Pamper Gems? I love it! You can see in my photo how nicely these are packaged - they're wrapped in a piece of saran type wrapping and then again inside a little baggie and tied off with a holo ribbon. The Pamper Gem arrived to me perfectly intact with no breakage or crumbling.  Elizabeth goes the extra mile with labeling, including a label with her contact information AND instructions/ingredients for each Gem.

I used one last night after swatching and since I was just doing my hands, I actually only used half of the Pamper Gem meaning you can easily get two uses out of these beauties! Starting this month, there will be varying scents and designs each month going forward. These Pamper Gems are deep conditioning and the peppermint scent was so relaxing! My hands felt so much more conditioned after I was finished using mine. Its recommended that you don't use these in the bathtub since they contain so many oils that they'll make the tub surface slippery. You can buy these in singles for $1.50 each, doubles for $2.50 (includes 2), or as a trio for $3.75.
Peppermint Pamper Gem

All of the products I reviewed here are available right now on the My World Sparkles Lacquers website. Each of the polishes retail for $8. All My World Sparkles Lacquers are proudly 5-free and hand mixed. She can also create custom lacquers for you - Elizabeth can be contacted directly on her website or on many social media platforms including Facebook, Instagram, and Twitter. She also has a Facebook group you can join to chat with her and other MWS fans! 

Which one is your favorite? 

Thanks for reading! 

Want to see more? Click below to connect with me!