Tuesday, March 31, 2015

M Polish "Polish Of My People" swatch and review! (Image heavy)

***Press sample***

Hey y'all! 

Today on the blog, I have a swatch and review of 4 polishes from the upcoming "Polish Of My People" collection debuting next week from M Polish! This is a very special collection because each of the polishes are loosely named for some of the nail friends that Megan, creator of M Polish, has met along her journey in the nail community. 


Left to right: M Polish Fresh Perspective, Hottie, Scouting the Beach, Pish Plashin' Around 

The "Polish Of My People" collection from M Polish is a summer collection and features 7 super bright, almost neon polishes that stamp beautifully over light and dark colors. I was sent 4 of them to swatch and have lots of pictures to show you, so lets get started! 

Top left: Fresh Perspective, bottom left: Hottie, top right: Scouting the Beach, bottom right: Pish Plashin' Around

Let's talk about my first impression upon seeing these packages: WOW. I already own some M Polish that I purchased myself and love it so I had high hopes for these. They are very opaque, true to the color in the bottle, and stamp like a dream. Let's take a look at the images that I used for swatching - all of these images are from Moyou London's Sailor 06 plate. They came out very crisp and sharp, all of these stamps were done on first pickup. I had no issues getting a good image with any of them. The polishes have no smell that I noticed without putting my nose practically on the bottle. And as all of her other polishes are, this collection is FIVE free and cruelty free. 

Top left: Fresh Perspective, bottom left: Hottie, top right: Scouting the Beach, bottom right: Pish Plashin' Around

The first one that I swatched was Fresh Perspective. It can best be described as a hot pink stamping polish with a metallic finish. I swatched it here over black (Zoya Willa) and white (Zoya Purity) to show what it looks like over dark and light colors. Each of these stamps were first pick up. Again, no issues getting a clean image. 


M Polish Fresh Perspective shown over Zoya Willa and Purity with topcoat

The next one that I swatched is called Hottie. It can best be described as a bright orange stamping polish with a metallic finish. It is swatched over Zoya Willa and Zoya Purity to show how it looks over both light and dark colors. I had no issues getting a clean image on this one either. 


M Polish Hottie over Zoya Willa and Purity with topcoat
The third one that I swatched and one of my two favorites is called Scouting the Beach. It can best be described as a bright, neon yellow stamping polish with a metallic finish. I absolutely loved the way this one looked over black! Again, swatched over Zoya Willa and Purity to show its color properties over both light and dark colors. Once again, I had no issue with stamp pickup. Are you seeing a trend here yet? :D 


M Polish Scouting the Beach over Zoya Willa and Purity with topcoat

Last, but most certainly not least, is my favorite of the bunch - Pish Plashin' Around. Now, if you follow me on Instagram, you know that my screen name is @pish.posh.polish. That's right folks, this one was named for me! Each of the other polishes have a similar story but I will leave it up to Megan or the ladies they were named for to reveal theirs. :) I love this polish so much - it is so perfect that she picked the blue one to name for me because I am a sucker for blue nail polish and this one is no exception to that. 

Pish Plashin' Around can best be described as an almost cornflower, summery blue stamping polish with a metallic finish. It is shown here over Zoya Willa and Purity to show its color properties over light and dark colors. You'll note that my thumb looks different in this picture, stay tuned to further posts about this collection to find out why. ;) 


M Polish Pish Plashin' Around shown over Zoya Willa and Purity with topcoat 

As I said previously, I already own M Polish that I purchased with my own money, so I knew the quality standards of this brand. I am pleased to say that this collection met those standards and then some. I can't wait for her to launch the line so I can buy a full sized version of these and the 3 I don't yet have. The "Polish Of My People" collection launches next week, day and time to be announced so make sure to follow M Polish on INSTAGRAM to find out specifics. You can also sign up for her newsletter on her store's website HERE


Do you think you'll pick up any M Polish when this collection launches? What other summer collections are you most looking forward to? 


A snapshot of the card included with every M Polish purchase. 


Want to see more? Follow me on INSTAGRAM to see more swatches and nail art!


***These polishes were sent to me for swatches and my honest review. All opinions expressed in this post are my own. I was not compensated.***


Monday, March 30, 2015

Tropical gradient nails!


Hey y'all! 

Today on the blog I have a short and sweet post for you to show off these tropical gradient nails I did. 


Let me start off by showing you what I used to create this look: 


I started with my Qtica Natural Nail Growth Stimulator as my base coat to protect my natural nail. I've found that it also helps my nails with peeling, so double win! I put Zoya Tomoko on my thumb, index, and pinkie for some sparkle. I did two coats and added a quick dry topcoat, I used KBShimmer Clearly On Top. I used Orly White Tips for the base of my gradient. 

Once my one layer of that was dry, I used Shinespark Polish Pumped Pink, Outrageous Orange, and Psych'd Purple on a makeup sponge to create my sunset gradient. I did 2 passes with the sponge to get the opacity I wanted and allowed it to dry. 

Once my gradient had a few minutes to dry, I went in with my black acrylic paint and a small detail brush and hand painted the palm trees. I was surprised with how easy it actually was! Once my trees were dry, I top coated with Clearly On Top to seal everything in. 

I really loved this mani, it was simple but made such a statement. What do you think of it? What are you favorite, easy freehand designs? 

Stamping with M Polish over a pastel jelly sandwich base!

**Nothing to disclose**

Hey y'all! 

Today on the blog, I have some springy/Easter-y stamping for you. I love how delicate this turned out, although my light box washed it out a bit. 

Stamping with M Polish Apricot Delight

I was thrilled with how this turned out. I was inspired by the super talented Ana over at Ana's Manis for this mani. If you're not following her, you should be! She does beautiful work. 

How about a shot of what I used to create this mani? 


Left to right: QTica Natural Nail Growth Stimulator, China Glaze Inner Beauty, Cagedbird Nail Lacquer Faerie Carnival, M Polish Apricot Delight, Zoya Satin topcoat.

And because I had a total DUH moment, I forgot to include the stamping plate in the above photo, so I took a separate shot after the fact: 

BornPretty Store stamping plate #JQ-18

I started with my QTica base coat. That stuff is the bee's knees for real. My nails have never been healthier! I went on to adding one coat of China Glaze Inner Beauty. This polish was a clearance purchase from Sally's Beauty Supply and I was pleasantly surprised to find out it was a jelly. If you've been reading my last 10 or so posts, you know that I am having a major love affair with all of the jelly and crelly polishes!

After my first coat of Inner Beauty was mostly dry, I added a coat of Cagedbird Lacquer Faerie Carnival. I purchased this polish in a destash and fell in love with it. I was so disappointed to find out that this indie brand is no longer in business. :( This polish is a glitter topper that has scattered holographic micro glitter and matte pastel hex glitter in a clear base. SO beautiful for spring manis. Once that layer was dry, I went back with one more layer of Inner Beauty and allowed a few minutes of dry time before moving on to stamping.

Using M Polish Apricot Delight and my BPS stamping plate, I added a lacy floral design to my jelly sandwich. I decided that I didn't want it to be super shiny so I topped it with the Zoya Satin topcoat that I got from Ulta as a free gift when they were running a promotion.

Here's a macro to show the details of the stamping. How delicate is that?


Macro of stamping with M Polish Apricot Delight over China Glaze Inner Beauty and Cagedbird Nail Lacquer Faerie Carnival 

I have been doing Easter manis this week and kind of wanted to do something that wasn't super Easter-y but could still fall into that category. What do you think of the final result?

Want to see more? You can find me on INSTAGRAM for more nail art and polish swatches!

Saturday, March 28, 2015

Watermarble and stamping!

***Nothing to disclose***


Hey y'all!

Today on the blog, I have some super fun watermarble nails to show you! I was positively thrilled with the outcome of this mani. I wore it for 3 full days because I loved it so much. 

Watermarble nails using Shinespark Polish's 80's Neon Collection


Here's what I used to create this look:


Back row, left to right: QTica nail growth stimulator, Orly White Tips, Funky Fingers Dark Knight, INM Northern Lights, KBShimmer Clearly On Top. Front row, left to right: Shinespark Polish Pumped Pink, Yuppie Yellow, Psych'd Purple, Bouncin' Blue, and Glam Green. Stamping Plate in the front is Cici&Sisi Plate 03.

Here's a closer look at the image I used to stamp:

Image from Cici&Sisi plate 03.
I started with a base of Orly White Tips after applying my base coat. I allowed it to mostly dry and applied a liquid latex barrier around my finger for the watermarble. I started dropping the polish into the water in the order that I showed them above, made a random design, and dipped my fingers one at a time. I actually wasn't planning on stamping these at first but this watermarble was NOT my best work and I didn't have time to redo an entire mani. I had seen my lovely friend Megatuce stamp over a neon watermarble so I just went with it. I used Funky Fingers Dark Knight to stamp my design and sealed it all in with KBShimmer Clearly On Top. I love it! 

Here's another shot of the finished product:

Neon watermarble with stamping

What do you think of this look? Have you ever stamped over a watermarble design?


Want to see more? Follow me on INSTAGRAM for more nail art and polish swatches!


Thursday, March 26, 2015

Watermarble using M Polish!

***Nothing to disclose***


Hey y'all!


Today on the blog, I have a simple post for you showing these pink and nude watermarble nails. 


Watermarble using KBShimmer In Bare Form as a base and M Polish Annette for the marble.

Here's a picture showing what I used for this look:

Left to right: QTica nail growth stimulator, KBShimmer In Bare Form, M Polish Annette, Sally Hansen Clear'd For Takeoff, KBShimmer Clearly On Top

I started with 3 coats of KBShimmer In Bare Form as a base color for my watermarble. Once it had a few minutes to mostly dry, I placed liquid latex around my nail to protect my skin from the polish. Using M Polish Annette and a clear polish from Sally Hansen called Clear'd For Takeoff, I created the watermarble that you see above. Once it had dried for a few minutes, I added my favorite new topcoat: KBShimmer Clearly On Top. 

I was really happy with how this turned out, although it was cloudy that day so I wasn't able to capture the sparkle of In Bare Form which is always a bummer. Why is it always cloudy when I want to wear a holo?! 

What do you think of this look? Have you ever used clear polish for a watermarble? Which clear is your favorite for that technique?


Want to see more? Find me on INSTAGRAM to see more nail art and swatches!

Green Glitter Indie Polish swatch and review


***Press Sample***


Hey y'all! 

Today on the blog I have a swatch and review of some more polishes from Green Glitter Indie Polish to show you! 

Top: Tin Man, bottom left: Girl On Fire, bottom right: Pink Champagne Supernova

I am really excited to show you these polishes because I think they're super unique! Each of them are slightly textured with varying colors and finishes. Let's jump right in, shall we? 


Tin Man shown in 2 coats, no topcoat
The first polish that I have to show you is called Tin Man. This polish is from the GG Indie Polish Wizard of Oz collection. This cool grey polish is slightly textured with silver glitter throughout. I had no issues with the application of this polish, the formula was very easy to work with. This swatch is two coats, no topcoat. I believe you could smooth out the texture by applying topcoat. 


Macro of Tin Man: 2 coats, no topcoat

The second polish I have to show you is called Girl On Fire. I adore this polish! This one can be best described as a red to orange duo chrome with red glitter throughout. It was difficult to show the shift but you can see it a little better in the macro. I had no issues with the application of this polish, although it did leave some brush strokes as you can see in the swatch. That doesn't really bother me because I find that its pretty common in any metallic finish polish. I also didn't topcoat these swatches and I think the brush strokes would be less visible with a topcoat. This one also had a slight texture due to the glitter but it would likely smooth out with topcoat. This is two coats, no topcoat.

Girl On Fire: 2 coats, no topcoat

Macro of Girl On Fire

The final polish I have to show you is called Pink Champagne Supernova. This polish is incredibly unique to any other polish I have ever seen! It can best be described as champagne colored polish with blue iridescent shimmer. I had no issues with the formula on this polish, it applied very smoothly in 3 coats. It does have a slight texture to it which, like the others, would likely smooth out with the application of topcoat. I tried in all sorts of lighting to capture the shift of this polish but my camera just couldn't do it! I really need to invest in a better quality camera so that I can do these polishes justice! This polish would be excellent for someone who wants a classy nude pink polish with a little extra "oomph."

Pink Champagne Supernova: 3 coats, no topcoat


Macro of Pink Champagne Supernova

If you are interested in purchasing any of these polishes, you can find them on the Green Glitter Indie Polish WEBSITE. You can also follow her on INSTAGRAM for future news and releases. 

Want to see more? Find me on INSTAGRAM for more swatches and nail art! 

***All opinions expressed in this review are my own. I am not compensated.***


Friday, March 20, 2015

Green Glitter Indie Polish Spring Duo swatch and review!

***Press Sample***

Hey y'all! 

Today on the blog, I have a swatch and review of the Green Glitter Indie Polish Spring Duo! I am so happy that spring is officially here and we can all start to open up our windows and break out the bright colors. 

Bobbi from Green Glitter Indie Polish was kind enough to send me her Spring Duo to swatch and review and I was so happy to do so! The Spring Duo features two bright and ultra feminine shades called Watermelon Spritzer and Orange Creamsicle. 

Top left: Watermelon Spritzer, top right: Orange Creamsicle, bottom left: macro of Watermelon Spriter, bottom right: macro of Orange Creamsicle
Better known as GG Indie Polish, all of Bobbi's polishes are big 5 free and cruelty free. They are supposed to be quick drying and long lasting. I did find that they dried quickly after applying which was actually a pleasant surprise for me because I didn't know that they had that quality! I never wear polish for very long, especially when I am swatching but I did wear Orange Creamsicle for two full days and only had very minor tip wear. I found that to be impressive since I am a stay at home mother of two boys which means lots of playing with cars, cleaning dirty hands, and folding laundry! 

Let's move on to the swatches. 

Watermelon Spritzer, 3 coats with topcoat 
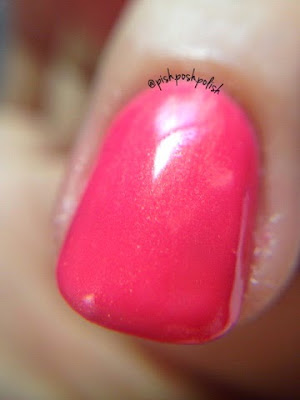
Watermelon Spritzer was the first polish out of the duo that I swatched. It can best be described as a bright pink polish with gold micro shimmer throughout. This is shown in 3 coats plus top coat. I had no issues with the application of this polish and was very pleased with how it leveled itself out. The finish is not quite a cream or a jelly, but a crelly. I loved how squishy it was even though it was completely opaque. 

I included the macro of Watermelon Spritzer so that the gold shimmer is easier to see. 

Macro of Watermelon Spritzer 


Orange Creamsicle, 3 coats with topcoat
Moving on to my favorite of the duo, this is Orange Creamsicle. This polish can best be described as a peachy orange crelly polish with matte white circle glitter throughout. I found no issues with the application of this one either. I didn't have to do any major fishing to get the glitter out which surprised me because the glitter in this polish isn't densely packed. I expected to be fishing around forever but they came out almost all on their own! This is 3 coats with topcoat. Again, SO squishy. 

Here's a macro to show the glitter, this was on my thumb and all of these came out on their own.


Macro of Orange Creamsicle

Overall, I give this duo a thumbs up. Both polishes had formulas that were very easy to apply which is really my gauge on the quality of a polish when I first try it. I am really excited to try more polishes from GG Indie Polish! This duo is still available in her store if you'd like to purchase it. You can find it HERE. You can follow news on future releases and see more swatches on her INSTAGRAM. Go check her out! 
Left to right: Orange Creamsicle and Watermelon Spritzer

Have you ever tried any polishes by GG Indie Polish? Which polishes are you most looking forward to wearing for spring? 


Want to see more? Find me on INSTAGRAM!

***All opinions expressed in this review are my own***


Saturday, March 14, 2015

MPolish "Mama Loves Polish" Mother's Day duo swatch and review!

**Press Sample**


Hey y'all!

Today on the blog, I have a swatch and review of the MPolish "Mama Loves Polish" Mother's Day duo that releases on Thursday, March 19th.

MPolish Annette and Sliver of Hope

First, let me start by saying that I absolutely adore how a handwritten card is included in all of the packages from MPolish. She even included a wax seal to close the envelope, y'all! Talk about attention to detail. It has a unicorn on the front and she hand printed inside!

MPolish Annette and Sliver of Hope


This duo was created by MPolish for a friend of ours in the nail community, Rebekah, that recently lost her best friend, Annette to breast cancer. Annette left behind a husband and three young children, ages 1, 3, and 7 years. Annette received care for her cancer but by the time they caught it, she was at stage 4. After a 3 month long battle, Annette lost her fight. That is when Rebekah decided to join the Avon Walk to End Breast Cancer, a division of the Avon Foundation. She is running a fundraiser with the intention of walking the full 39.3 miles of this walk for her friend, Annette and all women and their families that suffer from breast cancer. You can visit Rebekah's page for the fundraiser HERE


Moving on to the swatches and review, I started with Sliver of Hope which is a gorgeous gunmetal shade of silver. It is very thick, as stamping polish should be and very opaque. I am no well-seasoned stamper by definition but the formula on these polishes is phenomenal and so simple to work with. For those of us that struggle with stamping these polishes make it so easy because in my experience with them, they pick up the first time, every time. I used a stamping plate JQ-18 from ALIEXPRESS for the design and a WINSTONIA stamper from Amazon to stamp my nails. Perhaps my favorite quality of these polishes, other than their ease of use is their ability to be used over light and dark colors. As you can see here, I used it over Zoya Tove which is in the same color family and it shows up perfectly.

MPolish Sliver of Hope stamped over Zoya Tove
The second polish of the duo, and my favorite is Annette. Annette can best be described as a delicate, metallic pink that looks lovely over lighter or darker colors. This polish has the same qualities as Sliver of Hope and is very easy to use. Whether you are a novice stamper or stamping is old hat to you, you will find these polishes a dream to work with. I did a gradient of Zoya Purity and Tove to show Annette's chameleon-like abilities over lighter and darker colors. I used the same image three times and was profoundly amazed by the completeness of the image that picked up with this polish. As I stated before, I am not a seasoned stamper and have always found it rather difficult. Its great to see that if you actually use the proper tools what you're able to accomplish. 

MPolish Annette over a gradient of Zoya Purity and Tove

This duo is a definitely a winner and a must have. I love that it is not only beautiful and has a winning formula but that it has a meaningful tribute behind its creation. The "Mama Loves Polish" duo will release on Thursday, March 19th and will only be sold as a set. The set will retail for $13.50 with 50% of the proceeds going directly to the fundraiser in honor of Annette. You can purchase this duo, along with other MPolish HERE. She has just expanded her shipping to the UK and Australia! 

As always, thank you for reading!

Have you any polishes with special meaning to you? What are they?

**All opinions expressed in the review portion of this post are my own. These polishes were sent to me by the maker in exchange for my honest, forthright opinion.**


Monday, March 9, 2015

Shinespark Polish, 90's Kid's Collection swatch and review: part 2

**purhased by me**

Hey y'all!

Today on the blog, I have the second half of the Shinespark Polish 90's Kid's Collection review with swatches. I am so excited to show you this portion of the collection as its my favorite! 


Shinespark Polish 90's Kid's Collection (starting at the top and going clockwise): Ballerina Bunny, Rainbow Chaser, Markie, Peekaboo, Dancing Dolphins, and Max Splash)

Take a look at Peekaboo, a luscious vivid green neon jelly with subtle shimmer. This polish was so exciting to apply, the formula was amazingly smooth and easy to apply. I was reminiscing of childhood days and watching Nickelodeon where kids went on TV just to get slimed! Shown here in 3 coats plus topcoat, this polish is unique to my collection. Can you believe how bright it is without a white base?! 


Peekaboo, 3 coats plus topcoat

Peekaboo with OPI Matte topcoat

Next up is Dancing Dolphins, a beautiful ocean-y neon blue jelly with subtle shimmer. This is one of my two absolute favorites from this collection. The color is just to die for! I had no problems with the application of this polish, the formula is identical to the rest of the collection. 

Dancing Dolphins, 3 coats plus topcoat

Dancing Dolphins with OPI Matte topcoat

The final polish of the Shinespark Polish 90's Kid's Collection is my absolute favorite. Max Splash is a vivid orchid purple neon jelly with subtle shimmer throughout. The formula was exactly as good on this one as it is on all of the others in this collection. I love it when I fall in love with a color and a formula in a polish. I didn't want to take this one off. Check out how gorgeous it is matted! 


Max Splash, 3 coats with topcoat


Max Splash with OPI Matte topcoat 


Let me show you some nail art I did with these polishes. Probably one of my favorite manis to date was the one I did using Max Splash from Shinespark Polish and Snowberry from MPolish. I went back and used some acrylic craft paints and a small detail brush that I got from Michael's Craft Store to do the roses. 

Shinespark Max Splash stamped with MPolish Snowberry

The other mani I did with the 90's Kid's Collection was one inspired by the collection itself. The 90's Kid's Collection was inspired by the work of Lisa Frank so I felt as though I had to do an entire mani with this collection a la Lisa Frank. I have an entire blog post dedicated to this mani which will be coming out sometime later this week so keep an eye out for that if you want to see how I created it. 

Lisa Frank inspired mani using the entire Shinespark Polish 90's Kid's Collection

That concludes my swatch and review of the Shinespark Polish 90's Kid's Collection. Again, I just can't say enough good things about this collection. I am looking forward to other things to come from this indie brand. If you're interested in purchasing this collection, you can find them on her website HERE. You can also follow news and new releases from Shinespark Polish on her INSTAGRAM.

Will you be wearing neons this summer?


Sunday, March 8, 2015

Shinespark Polish, 90's Kid's Collection swatch and review: part 1


**purchased by me**


Hey y'all! 

Today on the blog I have the first half of the Shinespark Polish 90's Kid's Collection for swatch and review. The 90's Kid's Collection is the maiden collection from Shinespark Polish. This collection launched on February 28th, 2015 and is currently available for purchase. 


Left to right: Ballerina Bunny, Rainbow Chaser, Markie, Peekaboo, Dancing Dolphins, Max Splash, and Moondust (not a part of this section of the review, look for it in part 2). 

Let me start off by saying that every polish in this collection has a similar formula. Each of these polishes is a neon jelly with subtle shimmer. All of my swatches show 3 coats with topcoat. The formula on all of these polishes is fantastic; they go on smooth and stay where you put them. The only reason they require more than two coats is due to the jelly finish. These polishes dry relatively quickly and dry down to a semi-matte finish on their own, as do most neons. I had no patchiness or bald spots on my nail during application of any of them. Overall, this collection is most definitely a winner. 

Let's move on to the swatches and reviews of each polish. We will start with the first three in the collection: Ballerina Bunny, Rainbow Chaser, and Markie. 

Top left: Ballerina Bunny, Top right: Markie, Bottom: Rainbow Chaser

First in the collection is Ballerina Bunny. This polish is a neon jelly with a subtle shimmer that has a slight blue shift. Shown below in 3 coats plus topcoat, you can see how beautiful this polish is with a high gloss finish. The formula is perfect and applies easily.

Ballerina Bunny, 3 coats plus topcoat

Ballerina Bunny with OPI Matte topcoat
Second up, we have Rainbow Chaser. This polish is a neon orange jelly with subtle shimmer. Shown here in 3 coats plus topcoat, this polish reminds me so much of Crush soda! The formula is the same as all others in this collection, very smooth and easy to apply.

Rainbow Chaser, 3 coats with topcoat

Rainbow Chaser with OPI Matte topcoat
Third in the collection is Markie. This neon yellow polish with subtle shimmer. The shimmer in this one was a bit more obvious than in any of the others. The formula was the same on this one as the others, although slightly more sheer. It looks terrible with my skin tone, but all yellows do. Its not a fault of this polish by any means. Shown below in 3 coats plus topcoat.

Markie, 3 coats plus topcoat

Markie with OPI Matte topcoat

 Let me show you a few things I've done with this collection so far in terms of nail art.

The very first thing I tried with this collection watermarbling. I was pleased with the result. I wore Ballerina Bunny on my index, pinkie, and thumb and used the entire collection in the marble on the two middle fingers. They spread decently but do require a little working to get them into a design. They are a little difficult to see in the water because of their sheer, jelly consistency but they produce a beautiful result if you are willing to work with them a bit in this application.

Watermarble using the 90's Kid's Collection by Shinespark Polish

The most recent mani I did with these polishes is shown below. I used Ballerina Bunny and Pahlish Glittoris to make a pink jelly sandwich on my index, pinkie, and thumb. I used Markie and Zoya Purity on my middle two nails to make a jelly pond. This mani was inspired by the Yellow Polka Dot Bikini song. :) 

Jelly sandwich on index, pinkie and thumb. Jelly pond on middle two nails.


That concludes the first half of this two part review. I really like this collection from Shinespark Polish and feel as though all of the polishes are very good quality. If you're looking for a fun new way to wear neons this summer, definitely check these out. You won't be disappointed in these polishes or their formulas. I ordered these polishes on their launch date and received them less than a week later so I am very pleased with Shinespark Polish's customer service and shipping times. If you're interested in purchasing these polishes, you can find them HERE. To keep up to date on everything to come from Shinespark Polish, you can find her on INSTAGRAM.

Have you bought any Shinespark Polish yet? Which color is your favorite?

**Please follow me on INSTAGRAM to see more nail art and swatches.**