Sunday, January 10, 2016

Swatch And Review: Lolita Lacquer Valentine's Day Duo


Hey y'all! Today on the blog I have some super cute and sassy Valentine's Day products from Lolita Lacquer to share with you! Lolita Lacquer always stands out to me for making unique and beautiful mani bombs in addition to her fabulous polishes so I was pretty stoked to be asked to swatch for her again! I have plenty of pictures to show you, so let's just jump right in! 


How adorable is everything? My swatch bottles are minis but only full sized bottles (15ml) will be available for purchase for the polish duo. Each polish in the duo is inspired by different Valentine's Day candies - Just Talking is inspired by the little conversation hearts and Red Hot is inspired by the cinnamon heart candies. 

The first polish in the duo is Just Talking, a milky white crelly filled with pastel heart glitter, hex glitter, and small circle glitter. This has to be the best formula on a crelly I've ever used - each coat was nice and thin and each dip with the brush into the bottle produced just the right amount of glitter, including those darling little hearts! My swatch shows 3 coats plus topcoat and each coat self leveled nicely. Just Talking retails for $9 if you buy it as a single.
Just Talking in direct artificial lighting

Macro of Just Talking
 The second polish in the duo is Red Hot, a squishy fiery red jelly polish filled with bubblegum pink shimmer. Can you even? Its so sexy and flirty and cute all in one and the formula is easy as well. Red Hot was a bit thicker than Just Talking but each coat self leveled easily. My swatch shows two coats plus topcoat. Red Hot retails for $9 if you buy it as a single.
Red Hot in direct artificial lighting

Macro of Red Hot
 As I mentioned earlier, when you purchase the duo - you also get one conversation heart mani bomb in nice (Cutie!) or mean (As If!) and your choice of 4 scents - Avo Grass, Lollypop, Fluffy Candy, and Frosty. Here's the one I got to sample...SO adorable. Mira's mani bombs are some of the most unique I've ever seen in the indie market! These retail for $1 if you want to buy them separately from the duo.


The Valentine's Day Duo from Lolita Lacquer launches January 15th in the Lolita Lacquer Esty shop and will retail for $18 plus shipping. Again, you'll get your choice of mani bomb and cuticle oil as a part of the duo so its a super fun little package to get yourself for Valentine's Day! You can also follow Lolita Lacquer on Instagram for more swatches and information on the release of this duo! 

Which polish is your favorite? 

Thanks for reading! 

Want to see more? Click below to connect with me!


Wednesday, January 6, 2016

Swatch and Review: My World Sparkles Lacquer - Black Opal


Hey y'all! I took a little bit of a hiatus for the holidays and because my nails were in pretty rough shape for some reason but I'm back with my first post of 2016 to share a new polish by My World Sparkles Lacquer. This little beauty is called Black Opal and I have a ton of pictures to share with you, so lets get started! 


Black Opal is a gorgeous black jelly polish with various sized multichrome flakes running throughout. I'm sure you guys have seen the shattered glass nail art floating around on social media, right? Black Opal reminds me of that but in micro form all contained in one bottle! My swatch shows 2 coats plus topcoat. The application was easy though the formula was a bit on the thicker side. It also self leveled across my nail nicely. I had no issues getting the flakes out and they dispersed across my nail evenly. Overall, a beautiful polish with a great formula. 

Black Opal in direct artificial lighting
Macro of Black Opal
Being that its a jelly, Black Opal was begging to be mattified so mattify I did! I used OPI Matte Topcoat to showcase all of the beautiful multi chrome micro flakes in Black Opal. It totally transformed the look! 

Black Opal with matte topcoat in direct artificial lighting
Macro of Black Opal with matte topcoat 
Macro brush shot of Black Opal 
 I did a bit of nail art using Black Opal while doing a mani swap with @craftyandpolished, too! I love how it looked in this classy negative space mani! I wound up wearing this for several days because it was so beautiful.

The last thing I have to share with you guys today is January's Pamper Gem from My World Sparkles. This month's hand pampering beauty is a relaxing lavender scent and is garnished with real lavender flower buds. The Pamper Gems from My World Sparkles are made with deep conditioning oils and natural essential oils to provide a lasting scent and moisturizing properties as well. My hands were incredibly soft and moisturized after using it! 


Both Black Opal and the lavender Pamper Gem are available right now in the My World Sparkles shop. You can find them both HERE. Black Opal is 5 free and comes in a 1/2 oz (15ml) bottle and is on sale right now for only $5! The lavender Pamper Gem is available in a single pack for $1.50, a double pack for $2.50, and a triple pack for $3.75. I highly recommend trying them out! 

What's your favorite nail care product scent? 

Thanks for reading! 

Want to see more? Click below to connect with me!


Friday, December 11, 2015

Swatch and Review: Back In The Abbey by LynBDesigns!


Hey y'all! Today on the blog I have the latest collection by LynBDesigns to share with you! Spoiler alert - I can't even with this collection! I was thrilled when Jennalyn asked me to swatch for her again as I love her polishes and this collection is no exception. Called Back In The Abbey - this collection is heavily inspired by a fan favorite show, Downton Abbey. I have quite a few pictures to share with you, so let's get started!


First up is I'd Like To Call Her Sybil, a pink jelly filled with pink and gold flakes and scattered holo shimmer. My swatch shows two coats plus Orly Sec N' Dry topcoat. The formula was a little on the thicker side but application was a breeze. Both coats self leveled easily and dried to the touch in about 5 minutes.


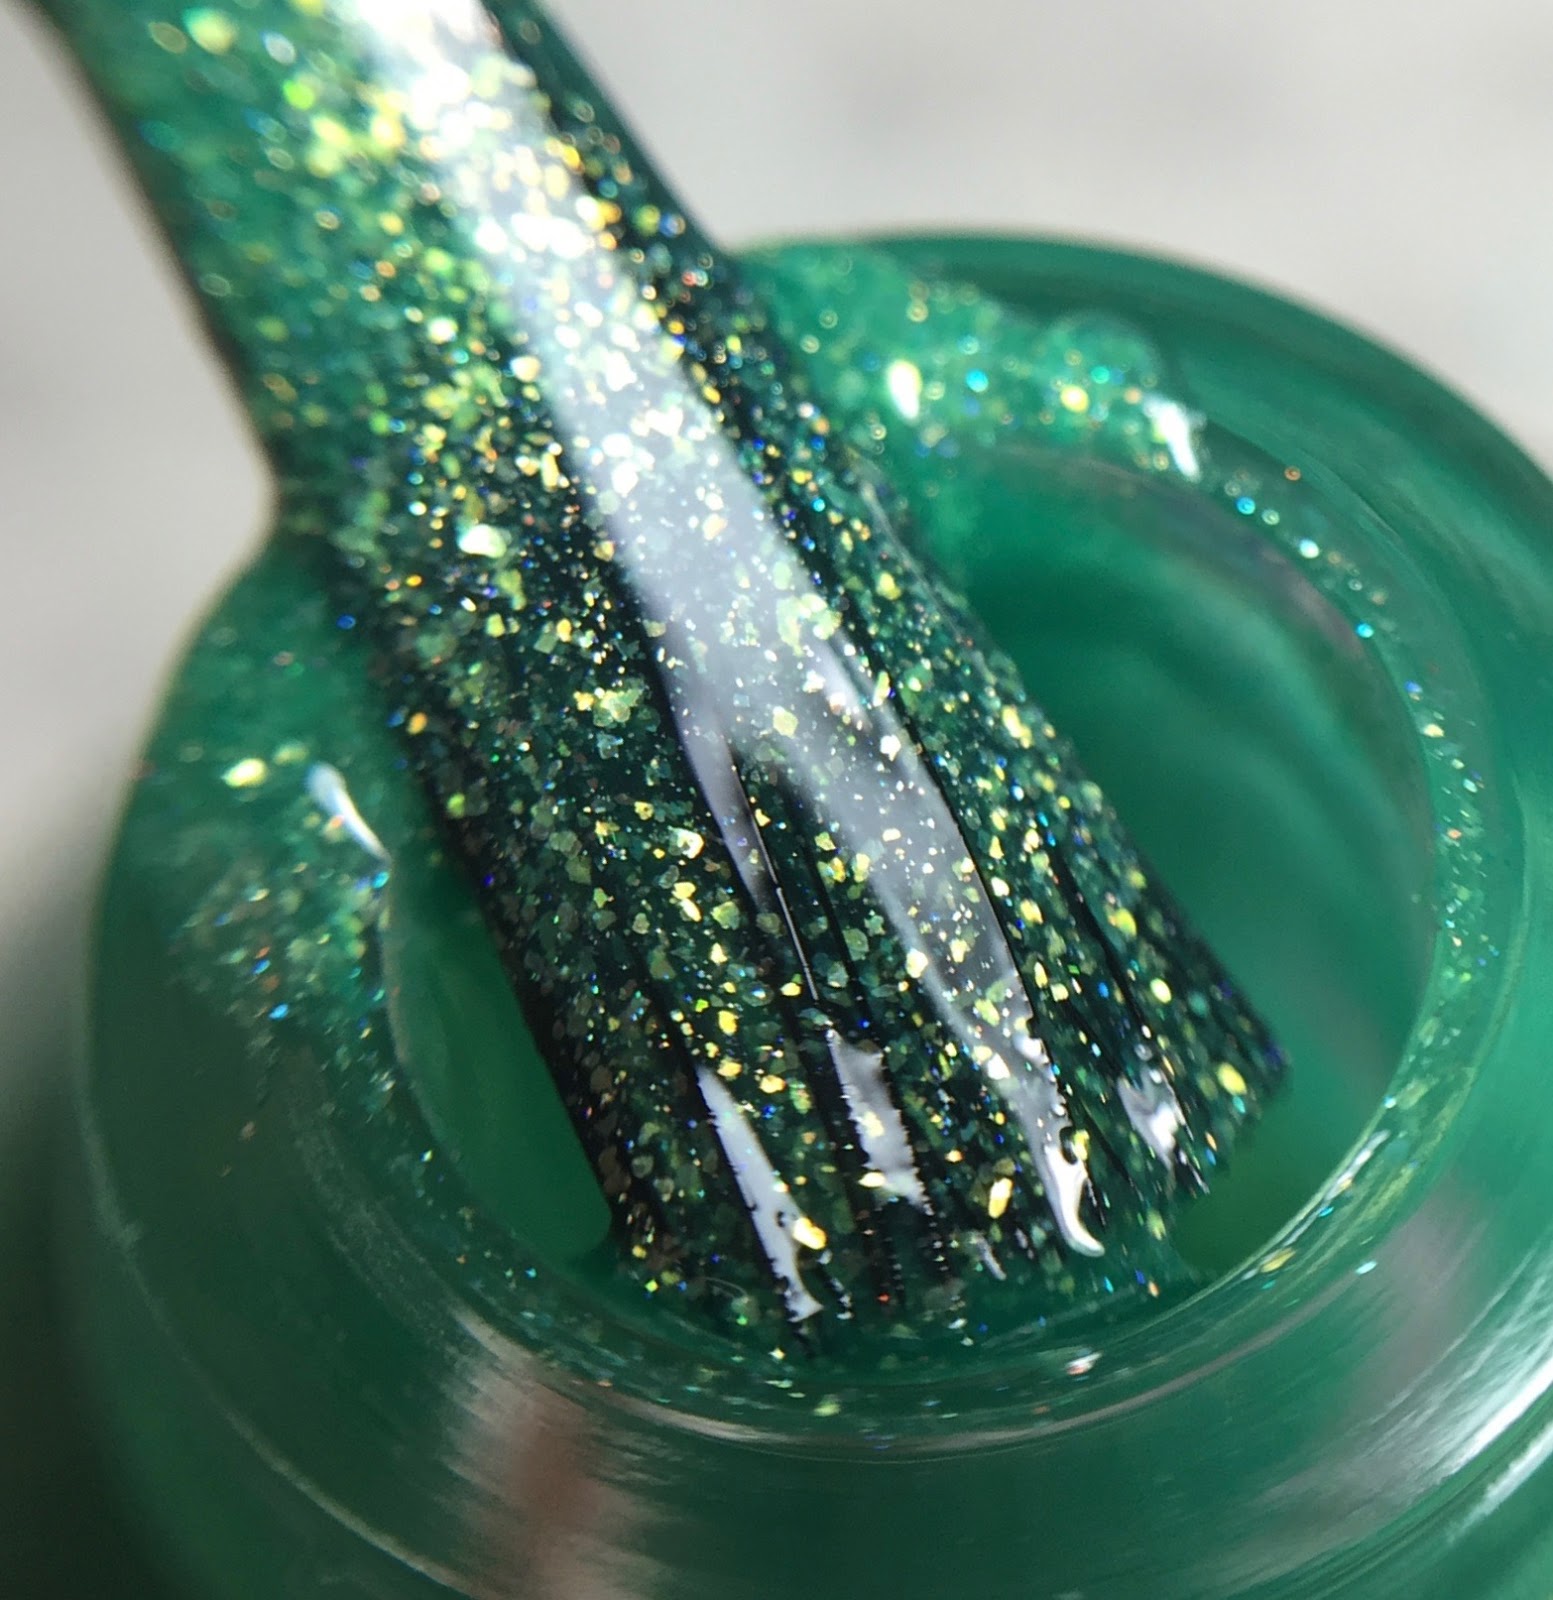
Next up is Master George, a green jelly filled with green/gold shifting flakes and holo shimmer. My swatch shows two coats plus Orly Sec N' Dry topcoat. The formula on Master George is similar to I'd Like To Call Her Sybil and was a tad on the thicker side but had a very manageable application. The formula self leveled easily and dried to the touch in about 5 minutes.


Next up is Vain And Silly Flirt, a blue jelly filled with blue holo flakies, and purple and holo shimmer. My swatch shows 2 coats plus Orly Sec N' Dry topcoat. The formula on Vain And Silly Flirt was absolute perfection and application was so easy! The formula self leveled very nicely and dried to the touch in about 5 minutes.


Golden Marigold is a bronze-y jelly base filled with copper/gold shifting flakies and holo shimmer. My swatch shows two coats plus Orly Sec N' Dry topcoat. The application was smooth and buttery on Golden Marigold, no thickness issues whatsoever. It self leveled nicely and dried to the touch in about 5 minutes.


The brown of the collection is Grandpa Donk - a grey leaning brown jelly filled with iridescent purple flakies, copper flakies, and holo shimmer. This polish is so beautiful and unique! My swatch shows 3 coats plus Orly Sec N' Dry topcoat. The formula on Grandpa Donk was more of a traditional jelly formula, still showing VNL on two coats which is why I added a third. It self leveled beautifully and dried to the touch in about 5 minutes.


The final polish I have to show you from the collection is Topsy Turvy World. How do we describe this one? A deep green/gold shifting linear holographic is the best I can do! It reminds me a lot of OPI What Wizardry Is This except with holo and no texture. This color is absolutely stunningly beautiful and that makes Topsy Turvy World my second favorite in the collection. My swatch shows 2 easy coats plus Orly Sec N' Dry topcoat. The formula was complete perfection. It applied like a dream and self leveled nicely. 

The Back At The Abbey collection launches January 1st, 2016 at 7pm EST on the LynBDesigns website. The entire collection will retail for $45 with free shipping within the US. If you purchase them individually, Grandpa Donk is $8 and the rest retail for $10. You can also follow LynBDesigns on Instagram and Facebook for more information about the release. Join us in the LynB Loves group on Facebook for the most up to date information! 

Which one is your favorite? 

Thanks for reading!

Want to see more? Click below to connect with me!


Wednesday, December 9, 2015

Nail Art: Winter Themed Snowflake Nails!


Hey y'all! Today on the blog I am sharing some wintery themed nail art with you. I thought it would be nice to take a break from Christmas specific nail art for a bit. I love LOVE snowflakes. I love using them in nail art and hanging them on my tree at Christmas time. I live in Georgia so we rarely see snow. As such, I have a weird fascination with it that my friends in colder climates just don't understand! Anyway, I have two snowy manis to show you today, let's jump right in!

Let's start with one of my favorite and most sparkly manis of all time! I used three polishes from the M Polish Winter 2015 collection to make a gradient on my nail. I started with my favorite base coat - LynBDesigns B-Stronger. Once that was dry, I used a latex free makeup wedge that I cut in half to make it more the size of my nail. I placed Frost first, followed by Bells, and finally Carol so that my colors were lightest to darkest starting at my cuticle. Now if you've ever done gradient nail art before, you know that it usually take several passes with the sponge to get the blended look that you're going for. With these polishes...ONE FREAKING PASS! I did bounce the sponge up and down a few times but I never reloaded my sponge. This is one coat with the makeup wedge! I added a quick dry topcoat  - mine is KBShimmer Clearly On Top to protect my base from smudging when it came time to stamp.

Once my base was dry, I used my Creative Shop Stamper and scraper along with M Polish Figgy to stamp an image from a Cici&Sisi plate for the snowflake image. I sealed everything in with another round up topcoat and that's it! Let me show you the macro:


The other mani I have to show you is a little less glitzy, but only just. Its also a bit more abstract and less traditional snowflake. That's because the images I used are from Bundle Monster's most recent holiday set and the plate with the large snowflake images are too big for my tiny baby nails right now. Oh well! Onward and upward, I say! I stamped an image from BM-S213 using M Polish Copper over 2 coats of Powder Perfect Deshret. I'm not sure if this Powder Perfect is still available but if you can get your hands on it - DO IT! Its a garnet textured polish with scattered holo glitters in it and such a gorgeous base for winter manis! Garnet happens to be my birthstone so I think that's why I'm drawn to it. Since its textured, I did topcoat with one coat before stamping so that my stamping wouldn't look textured. I also topcoated the whole mani again after the stamping so in the end, my base didn't feel or look textured anymore. Check out the macro!


That's all I have to share with you today! Which mani was your favorite? What's your favorite winter design? 

Thanks for reading!

Want to see more? Click below to connect with me!