Friday, February 26, 2016

Swatch and Review: Lolita Lacquer Petrichor Collection!


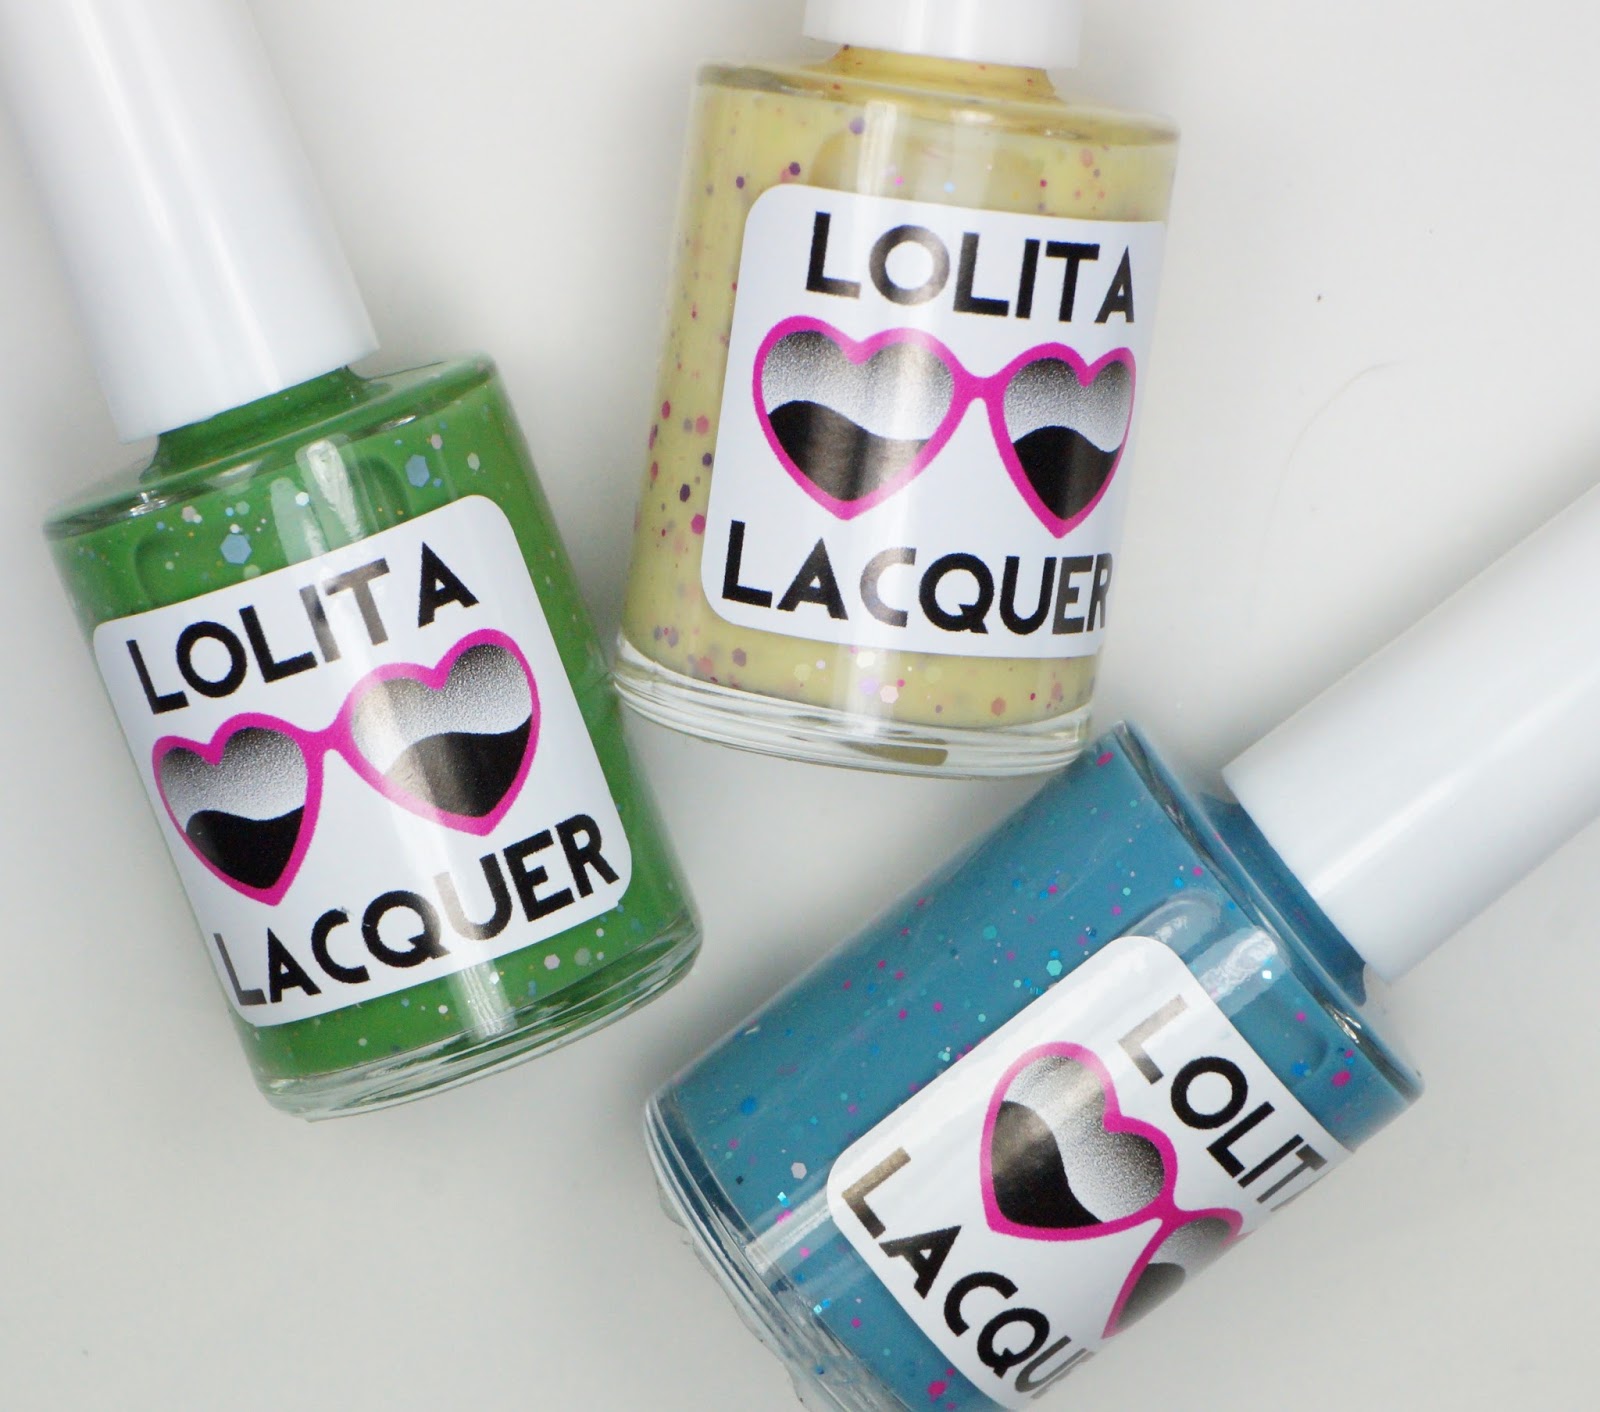
Hey y'all! Spring is just around the corner which means spring nail polish collections have begun their roll out including this one that I have to share with you today from Lolita Lacquer! This gorgeous mini collection is called the Petrichor collection. Petrichor is a word that describes the smell that accompanies the first rain after a while of dryness. Its such a cute name for a spring collection considering all the rain that usually rides in alongside of spring. Enough of my rambling on and on. You came for the polish - let me show you these beauties! 

Bluejay Blues in direct artificial lighting

Bluejay Blues macro
First up in the collection is Bluejay Blues, a cornflower blue crelly filled with matte pink, blue, and teal hexes and smaller circle glitters. The formula is nice and thin but easy to control. I didn't experience any application difficulties, each coat self leveled nicely. Bluejay Blues is opaque in 2 coats. My swatch shows two thin coats plus glossy topcoat. 

Drowning Daisies in direct artificial lighting


Drowning Daisies macro

Next up is Drowning Daisies, a medium toned yellow crelly filled with matte purple, pink, and iridescent hexes and small circle glitters. The formula on Drowning Daisies is identical to Bluejay Blues - nice and thin but no pooling or running. Each coat self leveled beautifully and Drowning Daisies is opaque in two coats. My swatches show two thin coats plus glossy topcoat.

Toad In A Hole in direct artificial lighting


Toad In A Hole macro

The final polish in the Petrichor collection is Toad In A Hole, a gorgeous apple green crelly filled with matte pale green, blue, and yellow hexes and smaller circle glitters. The formula on Toad is also identical to the others in the collection with an awesome easy and thin formula that applies to opacity in two coats. My swatch shows two coats plus glossy topcoat.

If you're as in love with this little collection as I am, you'll want the details of course! The Petrichor collection launches February 26th along with a restock of mani bombs including some new ones! You can find them all in the Lolita Lacquer Store and find more information about upcoming restocks on the Lolita Lacquer Instagram page!


Which of these is your favorite? Are you ready for spring collections?

Thanks for reading,

Want to see more? Click below to connect with me!


Friday, January 29, 2016

Weekly Series: #bhbuntriedchallenge

Heeeeey y'all! Today on the blog I am starting a new series! How exciting! A nail friend, +The Polished Perspective came up with a huge list for our little nail group so that we could delve into our untried and unloved polishes. This is something we had chatted a little about before so when she posted our list, I was all too excited to get started! The first prompt was to use a polish that started with the letter A. Let me show you what I came up with!


I started with Zoya Arabella as my untried/unloved polish. Arabella is one of the first polishes I bought after becoming an aggressive polisher. I found her at Ulta in the clearance bin and since I was buying everything under the sun at the time, of course I snatched it up. I don't show my mainstream polishes enough love so that's the drawer I went to first and Arabella was an easy choice because look how pretty she is! I have used Arabella in only one other mani that I can recall so it was sorta like meeting an old friend when I painted on that first coat. I did two coats of Arabella on all of my nails except my ring finger. For that nail, I did a swirl marble accent nail (inspired by Sveta Sanders) using Zoya Margo and M Polish Cranberry. I found that using my No. 7 watermarble tool from Whatsupnails worked the best for this technique. Once everything was dry, I topcoated with a shiny, quick dry topcoat. Heres the final result:


Long story, long - I must deeply apologize to Zoya Arabella for ignoring her for so long. The perfection that is the Zoya Pixie Dusts cannot and should not be ignored for so long ever again! 

What do you think of this mani? What's your favorite polish that starts with the letter A?

Thanks for reading!

Follow me!


Tuesday, January 26, 2016

Swatch and Review: Blue-Eyed Girl Lacquer!


Hey y'all! Today on the blog I have some more polishes from Blue-Eyed Girl Lacquer to share with you! In addition to her newest collection that I swatched last week (read that one here), I have one of her former Destination Duos and an earlier winter release that are still available in the shop. I'm going to show you the Sand And Surf Destination Polish duo which was a collaboration with Ellagee first and the single at the end. 

First of all, can we talk about the darling way the Destination Polishes came packaged? For $20, you get both full sized polishes, plus some cute little shell decals, and a magnet from Ellagee that says "I'm not going to buy any more nail polish, Oh look! NAIL POLISH!" I definitely chuckled when I pulled the magnet out because that exact scenario happens to me all too often. Okay, enough about the packaging, let's get into the polish! 


I started with the Blue-Eyed Girl Lacquer of the duo - this one is called Shimmering Sandcastles. This ivory nude creme is filled with green microflakies and silver, blue, aqua, and gold shimmers  which unfortunately, I struggled to capture with my camera. They were much more apparent in person! I really loved the color of this one, it definitely reminded me of the sparkling sand on the beaches in the summer sun. The formula self leveled nicely but had the application of a matte polish. It was a bit on the difficult side to apply due to its thickness, however I was able to even out the streakiness by the second coat. All Blue-Eyed Girl Lacquers are intended to be opaque in 1-2 coats which lends them to the thicker side but that is easily remedied with a bit of thinner. Again, this one dries on the matte/satin side but a glossy topcoat will fix that right up if you don't prefer the matte look. My swatch shows 2 coats plus topcoat. 

Shimmering Sandcastles in direct artificial lighting

Shimmering Sandcastles in direct sunlight
Macro of Shimmering Sandcastles in direct sunlight 
 The second polish in the Sand and Surf duo is the Ellagee polish called Rhythm of the Surf. This one is a turquoise blue jelly filled with shades of white, blue, turquoise, and shifting iridescent glitters. Since this was a thinner jelly, I struggled to get it opaque with no VNL. Even after 3 coats I could still see my smile line so I decided to put it over a white base! The glitters all came out smoothly and laid flat on the nail. I had no issues with getting the glitter out - no fishing required! I loved the look over white and I instantly became wistful for summer time and vacations to the ocean. My swatch shows two coats over a white base plus topcoat.


Ellagee Rhythm of the Surf in direct artificial lighting

Rhythm of the Surf in direct sunlight 

Rhythm of the Surf macro in direct sunlight 
I did a nail art look with the duo and added some of the decals to complete it! I started with 2 coats of Shimmering Sandcastles on my index, middle, and pinkie and 2 coats of Rhythm of the Surf over a white base on my ring finger. Once everything was dry to the touch, I cut very closely around each of the shells that I wanted to use and laid it face down (decal touching the nail with white backing facing me) and used a q-tip to soak the paper backing. I rubbed the q-tip against the back of the decal to press it down for about 30 seconds. I peeled off the backing and voila! A seashell on my nail! I will note that while these do remove with polish remover, they don't dissolve with acetone during cleanup so don't get them too close to the edge of your nail or cuticle line as i did on my index finger because they cannot be cleaned up like other water decals. I added a quick dry topcoat to everything and placed 3 turquoise studs on my pinkie to tie everything together. I absolutely adored this mani and wore it for about a week!


Last, but most certainly not least, I have the single prior release called Untrodden Snow. This beauty is a white creme with blue flash and blue shimmers. I absolutely loved the way this polish looked on me. So strikingly white with the surprise blue flash in different lighting. Untrodden Snow has a thicker consistency as well as its meant to be opaque in 1-2 coats so I had to be careful to let the first coat dry completely before adding the second to avoid streaks. Although application was a tad tricky, the formula self leveled nicely, leaving no pooling or streaks behind after the second coat. My swatch shows two coats plus topcoat. Untrodden Snow retails for $5 (mini) or $8.50 (full sized). 

Untrodden Snow in direct artificial lighting 
Untrodden Snow in direct sunlight
Untrodden Snow macro in direct sunlight

If you're interested in picking up any of the polishes I reviewed in this post, they are all currently available in the Blue-Eyed Girl Lacquer shop HERE. You can also sign up for the BEGL newsletter, follow BEGL on Instagram and Facebook, or request to join us in the fan group on Facebook for more news and upcoming releases!

Thanks for reading!

Follow Me!


Monday, January 25, 2016

Nail Art: M Polish Oh Shit, That's Pretty!


Hey y'all! Today on the blog I have a mani using the latest M Polish group custom to share with you! Both times that Megan has done a group custom for us, she's had us submit names for the polish and vote amongst ourselves. Whoever's name gets the most "likes" gets a free full sized bottle of the custom. The funny store behind the name of this polish goes like this - one of the group admins posted a photo of the polish and instructed us to try to come up with names. We all started commenting with names and one girl said "Oh shit, that's pretty!" as a passing comment. Of course we all agreed with her and her comment got the most likes so she inadvertently won the naming contest. Thusly, Oh Shit, That's Pretty was born. Let me show you the mani I did with mine. 


I started with China Glaze Inner Beauty on my index, middle, and ring finger and LaqueredUp No Regrets on my pinkie. I added Revlon Holographic Pearls to all of my fingers to add some extra sparkle. Once that was dry, I stamped an image from UberChic Beauty 4-02 using M Polish Oh Shit, That's Pretty. I topcoated everything with KBShimmer Clearly On Top quick dry topcoat to seal everything in. My favorite thing about OSTP is the chameleon quality of it. It looks so different in different lighting and over different bases. You can see in my macro the shift between purple and blue.


The group customs are limited to purchase by M Polish Lovers group members only but you can join us so that you can get them in the future too! Each custom is a highly limited batch and once they're gone, that's it. Sometimes Megan brings them back because we beg her until she relents. Haha! 

What's your favorite M Polish? 

Thanks for reading!

Want to see more? Click below to connect with me!


Wednesday, January 20, 2016

Swatch and Review: Blue-Eyed Girl Lacquer Innocence in the Moment Collection!

Blue-Eyed Girl Lacquer Innocence in the Moment Collection
Hey y'all! Today on the blog I have the Innocence in the Moment Collection from Blue-Eyed Girl Lacquer to share with you! BEGL is a brand that I have been dying to try because she's based in Georgia just like me but kept forgetting about. When I was asked to swatch this collection, I was pretty excited to say the least! All four of these polishes are beautiful and unique. I have a ton of pictures to share with you, so let's jump right in! 


The first polish in the collection is Basking in the Storm which is described as an amethyst purple with blue and aqua shimmers. I would classify this as a jelly like or crelly like polish but it was almost opaque in one coat! In the indirect lighting it does look almost blue black but in the sun you can see the purple base and all of the lovely shimmers. This polish is a bit on the thicker side but I had no issues with the formula as a whole. I would recommend not overworking the polish when you apply as the formula on this one dries relatively quickly so you can get some streaking. However, if you apply fairly quickly and just do two to three stokes when applying, it self levels beautifully and is perfectly opaque in two coats. My swatch shows two coats plus topcoat. This one retails for $8.50 (full) and $5 (mini). 

Basking in the Storm in direct artificial lighting 
Basking in the Storm in direct sunlight 
Basking in the Storm macro in direct sunlight 
 Next up is Chasing the Skyline, a royal blue creme with iridescent rainbow flakies. I had such a hard time capturing the flakies with my camera but they are very apparent in person. I absolutely love this shade of blue! Chasing the Skyline is another highly pigmented, almost one coater polish. I found the formula to be nice but a little on the thick side. Despite it being thicker, I was able to apply two thin coats which both self leveled easily. My swatch shows two coats plus topcoat. This one retails for $8.50 (full) and $5 (mini).

Chasing the Skyline in direct artificial lighting 
Chasing the Skyline in direct sunlight 
Chasing the Skyline macro in direct sunlight 
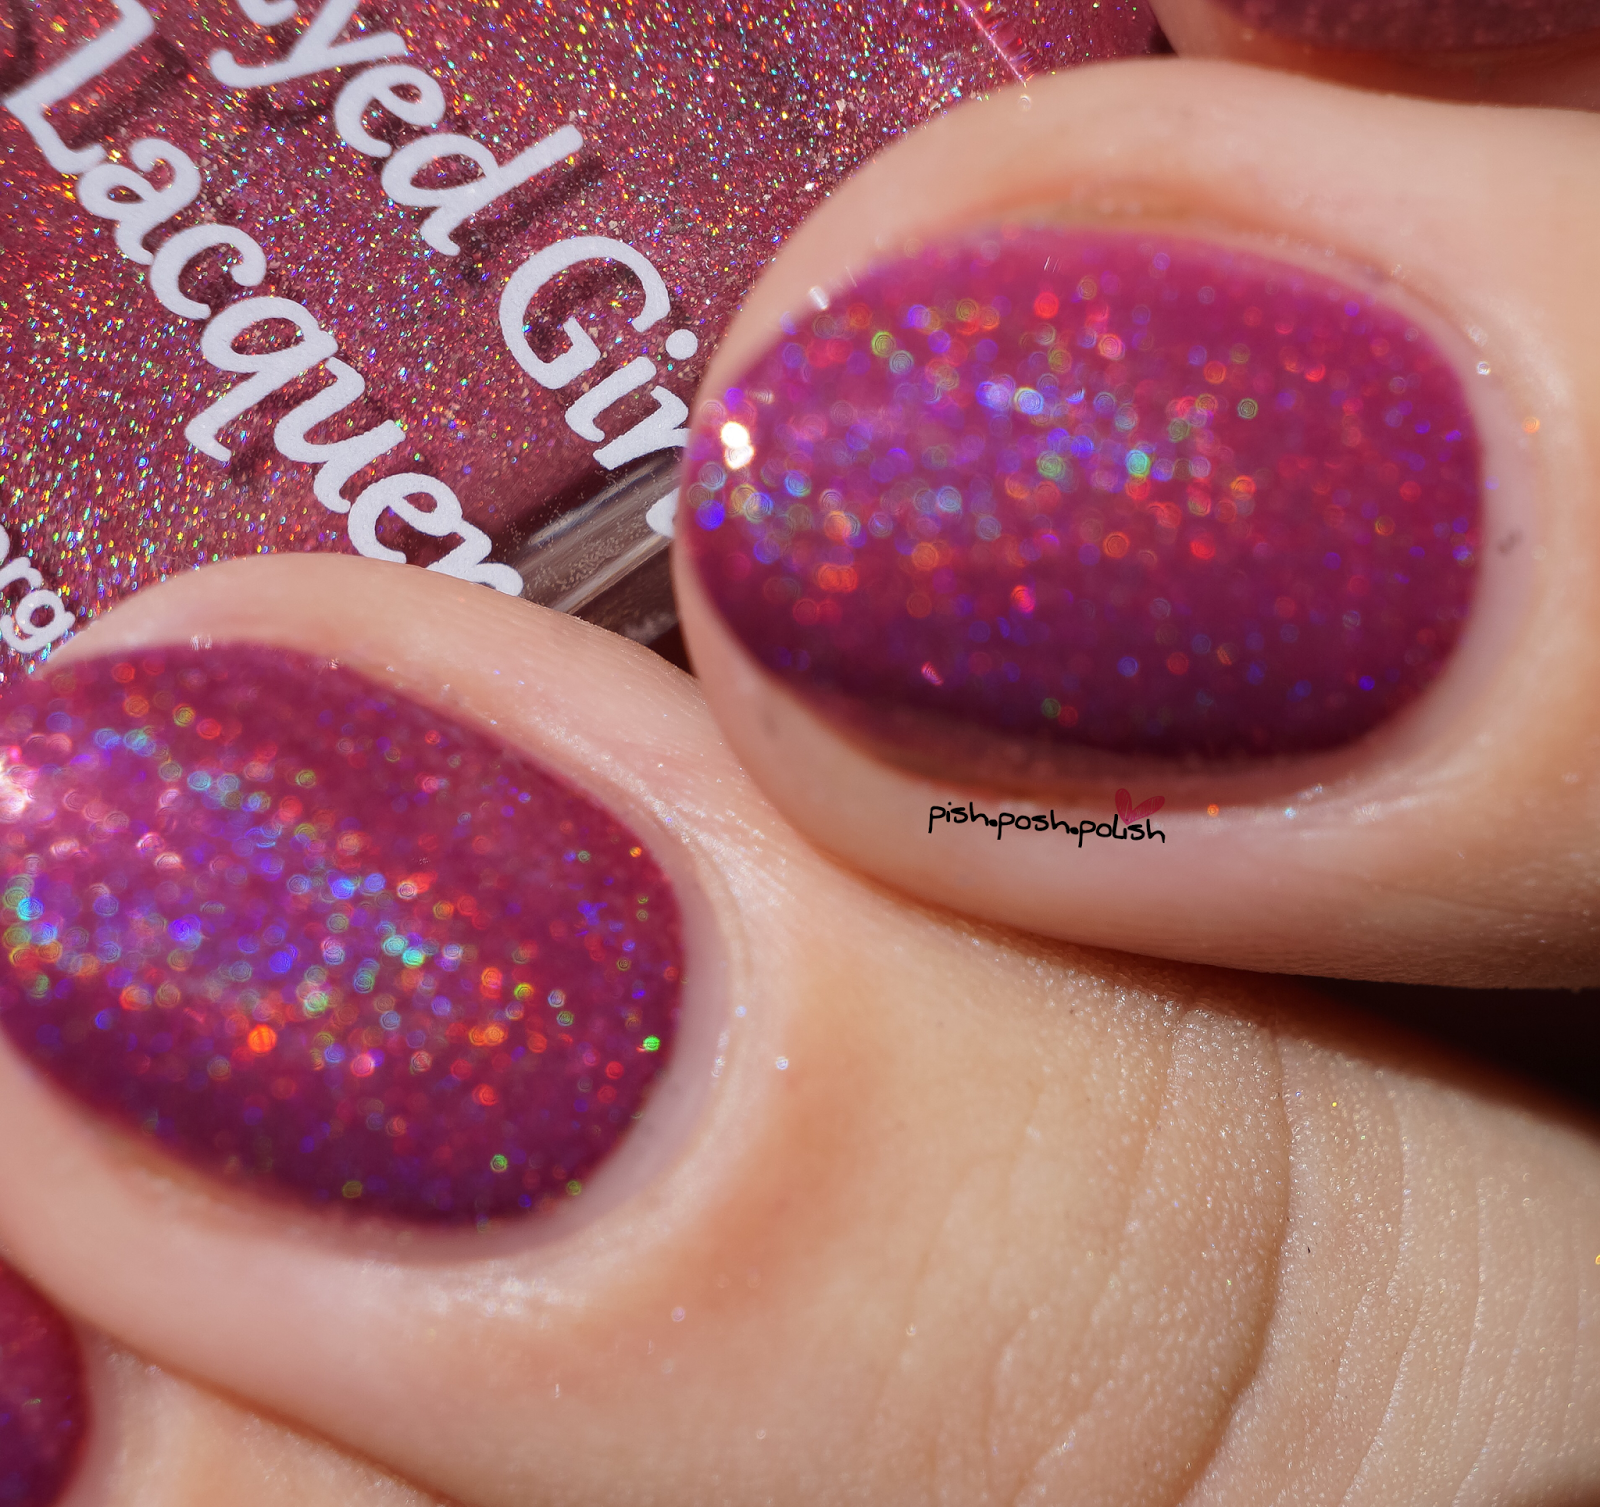
 Next we have The Seasons Change, a berry pink linear holographic with platinum micro flakies. You guys...this one is ONE coat. You definitely do not need a second at all, The Seasons Change is highly pigmented with a flawless formula. Again, a bit on the thicker side but no issues with self leveling or application. The platinum flakies bring something extra to this polish to make it especially girly and flashy. My swatch shows two coats plus topcoat. This one retails for $12 (full) and $6 (mini).
The Seasons Change in direct artificial lighting 
The Seasons Change in direct sunlight 
The Seasons Change macro in direct sunlight 
Last up is I Only Meant to Stay a While, an emerald green jelly with micro holographic glitters in green, silver, blue, and purple. This one is absolutely my favorite of the collection! I Only Meant to Stay a While has so much depth and dimension and is definitely one of the more unique polishes to my collection. Formula wise, this one mimics Basking In The Storm in that you cannot overwork the polish or you can get some streakiness. However, if you apply quickly and use minimal strokes, it applies beautifully in two even, self leveling coats. My swatch shows 2 coats plus topcoat. I Only Meant to Stay a While retails for $8.50 (full) and $5 (mini).

I Only Meant to Stay a While in direct artificial lighting
I Only Meant to Stay a While in direct sunlight 
I Only Meant to Stay a While macro in direct sunlight 
As a disclaimer, all Blue-Eyed Girl Lacquers are intended to be opaque in one to two coats and can be thinned at the users discretion if you'd prefer a thinner formula. I had no issues applying these despite them being on the thicker side.

The full collection will retail for $37.50 (full size) and $21 (mini size) and will be available for pre-order January 27th at 3:30 PM EST through January 29th at 3:30 PM EST. There will also be a new Destination Duo and special edition polish launching on the 27th but will be first come, first served rather than a pre-order. All of these polishes will be available in the Blue-Eyed Girl Lacquer store! You can also follow BEGL on Instagram and Facebook for more swatches and information regarding this launch.

Which one is your favorite? What are some of your other faves from BEGL?

Thanks for reading!

Want to see more? Click below to connect with me!